LibreNMS is a high-quality Network Monitoring System that originally was a fork of OpenNMS. LibreNMS has incredible support for all of the SNMP devices you’ll be interacting with and is actively developed by a small core of great devs who run their businesses on it as well.
The Network So Far
Here we are, the network in all it’s glory:
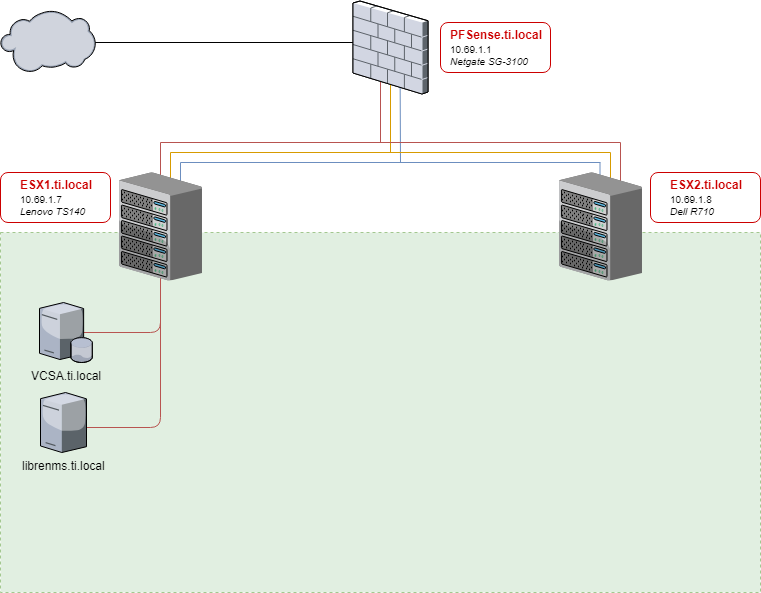
This is mostly to show you all how things stand currently. I am a VMUG Advantage member and so have access to everything included in EVALExperience for the cost of that membership ($200-10% using whatever the latest code is). This is a wicked deal for homelabbers who are serious about pursuing VMware knowledge, but honestly you can get by just fine using free ESXi, or physical boxes, or virtualbox, or proxmox, or whatever you have access to. In the end, I build four boxes and will be targeting some of my content at people who have the Vsphere API access (requires a vcenter), specifically using Ansible to build VM’s, but if you make them by hand you can do all the rest here without going VMware.
In the beginning, there was CentOS
To begin, we’ll set up LibreNMS and monitor our first endpoint. I am linking this guide here because the installation process may change over time, and this is the official documentation link.
Build a new VM. For the purposes of this guide, we’ll be using CentOS 7 for all of our monitoring environment’s VM’s. You can use another OS, but we use CentOS here for the following reasons:
- It is rock-solid stable
- You can get an enterprise support contract on it through RedHat
- It is the enterprise standard for linux in North America
- It contains several security features not found in many other linux distros
- Namely we will be leaving SELinux enabled for all of this, and I will guide you through any tweaks we need to make
Would Ubuntu/Debian/Suse work for this? Heck yeah, and they have instructions for it. Go for it. I vote for using whatever OS your org standardized on, and since my team lead told me “I don’t care what we use as long as we can get enterprise support on it and it’s stable”, I chose CentOS.
0: Prereq’s
I set up my CentOS boxes in a specific way:
- SELinux enabled, use the Standard Baseline policy if you have to make a choice
- I run all of the below commands as root unless specified otherwise…I’ll get into the why when we work with Ansible later on
yum install epel-release -yyum update -yyum install net-tools wget htop vim policycoreutils-python tmux yum-utils open-vm-tools -y- I use a cleaned template in vsphere so, make sure to give it a static IP and assign the hostname properly
1: Install LibreNMS
I am going to basically reiterate the current install process from the official Docs here. I make a few small tweaks to make it go faster for us.
Install Prereqs for LibreNMS
yum install epel-release

rpm -Uvh https://mirror.webtatic.com/yum/el7/webtatic-release.rpm

yum install composer cronie fping git ImageMagick jwhois mariadb mariadb-server mtr MySQL-python net-snmp net-snmp-utils nginx nmap php72w php72w-cli php72w-common php72w-curl php72w-fpm php72w-gd php72w-mbstring php72w-mysqlnd php72w-process php72w-snmp php72w-xml php72w-zip python-memcached rrdtool -y
Make a LibreNMS service user
useradd librenms -d /opt/librenms -M -r
usermod -a -G librenms nginx
Sync LibreNMS locally
Ignore warnings about running as root. This is fixed later (permissions-wise).
cd /opt
composer create-project --no-dev --keep-vcs librenms/librenms librenms dev-master
LibreNMS Database
Configure MySQL
systemctl start mariadb
mysql -u root
WARNING: You NEED to change the word password below to something secure. You WILL need this later, but do NOT copy paste this even in a lab. That’s just being lazy!
In the MariaDB shell:
CREATE DATABASE librenms CHARACTER SET utf8 COLLATE utf8_unicode_ci;
CREATE USER 'librenms'@'localhost' IDENTIFIED BY 'password';
GRANT ALL PRIVILEGES ON librenms.* TO 'librenms'@'localhost';
FLUSH PRIVILEGES;
exit
Now a couple tweaks to the mysql config file: vim /etc/my.cnf
Search for the [mysqld] section (mine was the top on a default install) and add:
innodb_file_per_table=1
lower_case_table_names=0
Now enable and roll the service with:
systemctl enable mariadb
systemctl restart mariadb
Web Server/Frontend
Make PHP-FPM do its unicorn magic:
Ensure date.timezone is set in php.ini to your preferred time zone. See http://php.net/manual/en/timezones.php for a list of supported timezones. Valid examples are: “America/New_York”, “Australia/Brisbane”, “Etc/UTC”, “America/Anchorage”.
vim /etc/php.ini
The section you need to modify should look similar to this after:
[Date]
; Defines the default timezone used by the date functions
; http://php.net/date.timezone
date.timezone = America/Anchorage
Now vim /etc/php-fpm.d/www.conf and do the following needful, adding the ; and then the lines not commented below:
;user = apache
user = nginx

group = apache   ; keep group as apache

;listen = 127.0.0.1:9000
listen = /var/run/php-fpm/php7.2-fpm.sock

;listen.owner = nobody
;listen.group = nobody
;listen.mode = 0660
listen.owner = nginx
listen.group = nginx
listen.mode = 0660
Now enable and restart php-fpm:
systemctl enable php-fpm
systemctl restart php-fpm
Configure NGINX
vim /etc/nginx/conf.d/librenms.conf
Add the below config, change the server_name to your server’s FQDN:
server {
 listen      80;
 server_name librenms.ti.local;
 root        /opt/librenms/html;
 index       index.php;

 charset utf-8;
 gzip on;
 gzip_types text/css application/javascript text/javascript application/x-javascript image/svg+xml text/plain text/xsd text/xsl text/xml image/x-icon;
 location / {
  try_files $uri $uri/ /index.php?$query_string;
 }
 location /api/v0 {
  try_files $uri $uri/ /api_v0.php?$query_string;
 }
 location ~ \.php {
  include fastcgi.conf;
  fastcgi_split_path_info ^(.+\.php)(/.+)$;
  fastcgi_pass unix:/var/run/php-fpm/php7.2-fpm.sock;
 }
 location ~ /\.ht {
  deny all;
 }
}
Warning!
If this is the only site you are hosting on this server (it should be :)) then you will need to disable the default site. Delete the server section from /etc/nginx/nginx.conf.
SELinux stuff!
Install the greatest tool ever made for SElinux management if you haven’t already:
yum install policycoreutils-python -y
Now configure all of the contexts that LibreNMS needs so IT can do the needful:
semanage fcontext -a -t httpd_sys_content_t '/opt/librenms/logs(/.*)?'
semanage fcontext -a -t httpd_sys_rw_content_t '/opt/librenms/logs(/.*)?'
restorecon -RFvv /opt/librenms/logs/
semanage fcontext -a -t httpd_sys_content_t '/opt/librenms/rrd(/.*)?'
semanage fcontext -a -t httpd_sys_rw_content_t '/opt/librenms/rrd(/.*)?'
restorecon -RFvv /opt/librenms/rrd/
semanage fcontext -a -t httpd_sys_content_t '/opt/librenms/storage(/.*)?'
semanage fcontext -a -t httpd_sys_rw_content_t '/opt/librenms/storage(/.*)?'
restorecon -RFvv /opt/librenms/storage/
semanage fcontext -a -t httpd_sys_content_t '/opt/librenms/bootstrap/cache(/.*)?'
semanage fcontext -a -t httpd_sys_rw_content_t '/opt/librenms/bootstrap/cache(/.*)?'
restorecon -RFvv /opt/librenms/bootstrap/cache/
setsebool -P httpd_can_sendmail=1
setsebool -P httpd_execmem 1
Allowing FPing As Well
Unfortunately we have to use a bit more involved process for this. Create a file via vim http_fping.tt with the following contents (this can be made anywhere as you can delete it once we’re done):
module http_fping 1.0;

require {
type httpd_t;
class capability net_raw;
class rawip_socket { getopt create setopt write read };
}

#============= httpd_t ==============
allow httpd_t self:capability net_raw;
allow httpd_t self:rawip_socket { getopt create setopt write read };
Now run these commands to put the file to use:
checkmodule -M -m -o http_fping.mod http_fping.tt
semodule_package -o http_fping.pp -m http_fping.mod
semodule -i http_fping.pp
The final command will take a bit to compile a binary selinux module. Congrats, by the way, you just correctly set selinux permissions AND you even compiled your own custom selinux module!
Firewall Rules
Since we used a baseline CentOS, we will configure firewalld instead of base iptables. Firewalld, when configured using the firewall-cmd tool, is just as simple as iptables—any sysadmin who tells you otherwise just wants these darned kids and their zones to get off his or her lawn! Remind me to do a primer on it later.
Anyway:
firewall-cmd --zone public --add-service http
firewall-cmd --permanent --zone public --add-service http
firewall-cmd --zone public --add-service https
firewall-cmd --permanent --zone public --add-service https
This configures the rules on the active session and the permanent session (what’s loaded on reboot), so you don’t have to run firewall-cmd --reload to get them to take effect.
Configure SNMPd
Simple:
cp /opt/librenms/snmpd.conf.example /etc/snmp/snmpd.conf
y
vi /etc/snmp/snmpd.conf
Find the text that says RANDOMSTRINGGOESHERE. Change this to your v1/v2c default community. If you DON’T have this set yet or this is all new to you, set it to public for now as you’ll find devices with SNMP enabled from the factory typically have public as their default community. If you’d like, change the default syslocation and syscontact here, but you REALLY should set these yourself on each device.
Now finish up the config and add the awesome distro utility! You’ll want to save a copy of this somewhere as well.
curl -o /usr/bin/distro https://raw.githubusercontent.com/librenms/librenms-agent/master/snmp/distro
chmod +x /usr/bin/distro
systemctl enable snmpd
systemctl restart snmpd
Cron Job
This default job works fine enough for our needs:
cp /opt/librenms/librenms.nonroot.cron /etc/cron.d/librenms
Set LogRotate
So as to make sure /opt/librenms/logs doesn’t fill up our disk, run the following to rotate them out:
cp /opt/librenms/misc/librenms.logrotate /etc/logrotate.d/librenms
Final File Permissions
chown -R librenms:librenms /opt/librenms
setfacl -d -m g::rwx /opt/librenms/rrd /opt/librenms/logs /opt/librenms/bootstrap/cache/ /opt/librenms/storage/
setfacl -R -m g::rwx /opt/librenms/rrd /opt/librenms/logs /opt/librenms/bootstrap/cache/ /opt/librenms/storage/
chgrp apache /var/lib/php/session/
Web Installer
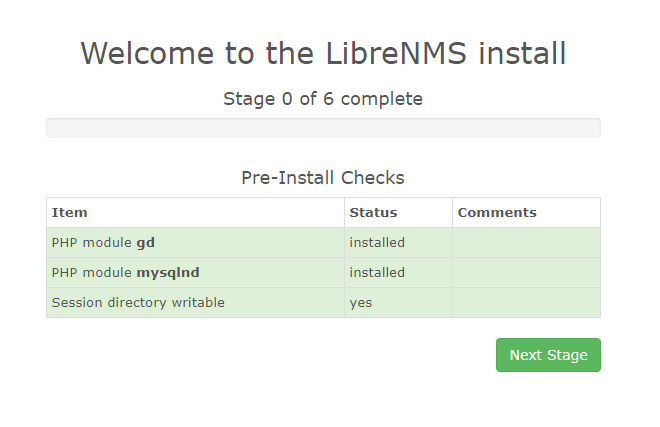
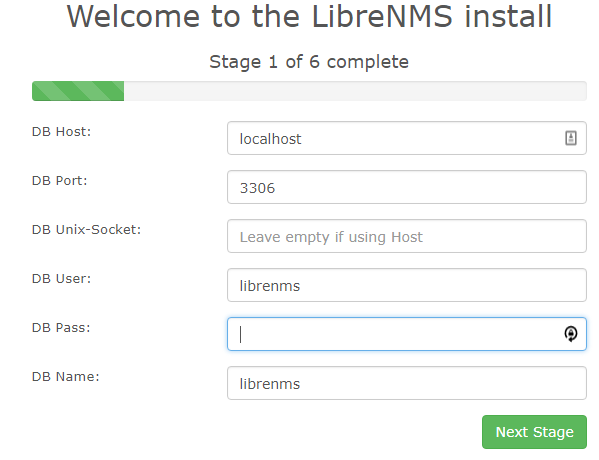
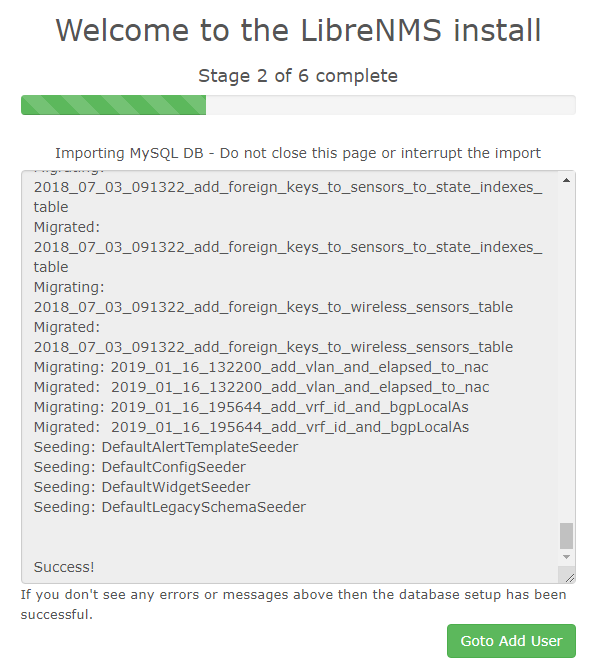
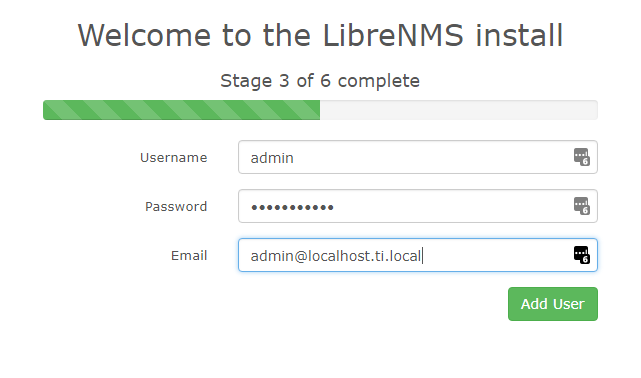
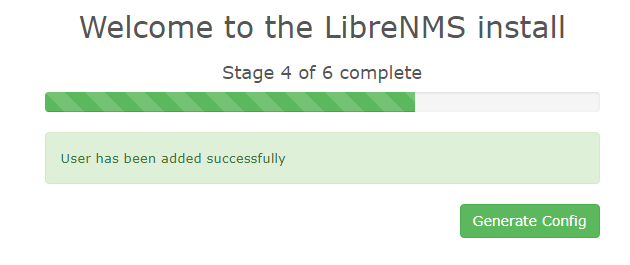
Now we go to do the webinstaller finishing touches! http://librenms.ti.local/install.php When you hit the install.php page you should see the following:
Follow the on-screen prompts to get this all set up.
Warning!
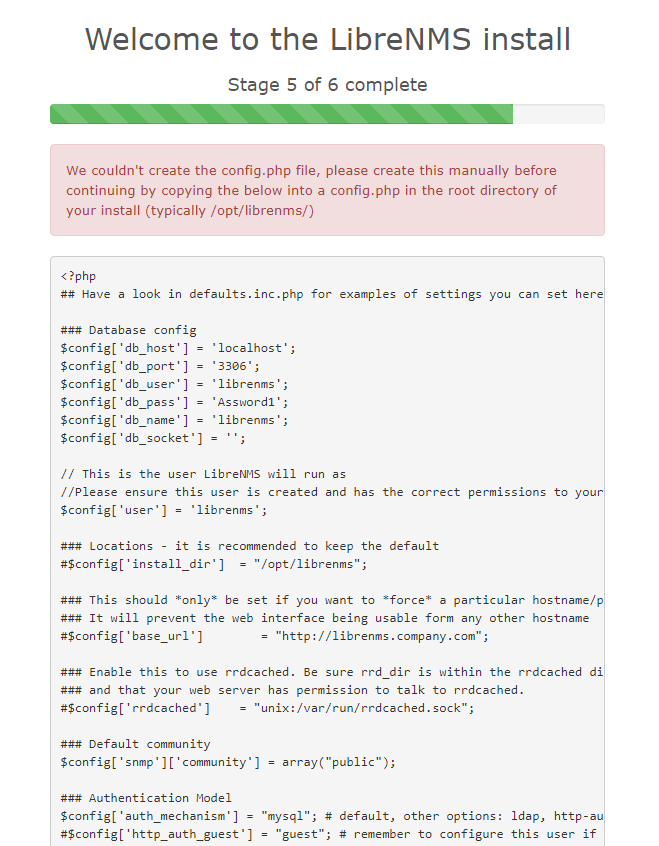
The web installer might prompt you to create a config.php file in your librenms install location manually, copying the content displayed on-screen to the file. First, vim /opt/librenms/config.php If you have to do this, please remember to set the permissions on config.php after you copied the on-screen contents to the file. Run:
chown librenms:librenms /opt/librenms/config.php
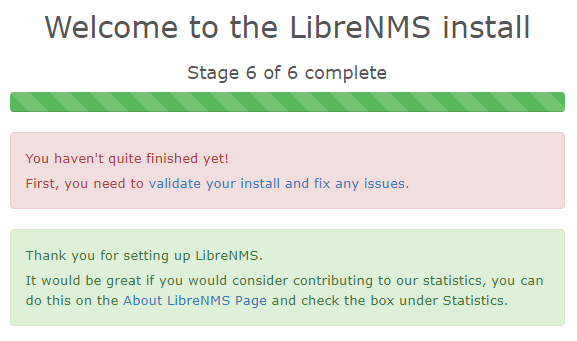
Now hit Finish Install!
and….
Troubleshooting
If you EVER have issues with LibreNMS, these are the first steps to run (as the librenms user):
cd /opt/librenms
./validate.php
Tweaks to LibreNMS
I do have a few tweaks we should make to LibreNMS before proceeding on. All of these changes are made by editing the config.php file via vim /opt/librenms/config.php and saving, and they take effect immediately (no service restarts needed).
Active Directory Authentication
If you have an Active Directory, set up LibreNMS to use Active Directory Authentication. This is big, never set up a system with a single user access.
Stable Update Channel (Enterprise Releases)
Trust me, set it up to use the Stable Update Channel. This is not master or devel, this is about once monthly and happens when they feel they have another stable release.
Email Alerts with embedded HTML graphs
If you want to have beautifully formatted email alerts, you can enable html emails and graphs:
$config['email_html'] = TRUE;
$config['allow_unauth_graphs'] = 1;
Nagios Service Checks
A requirement. Enable Nagios service checks being careful to note that in CentOS 7, they’re located in /usr/lib64/nagios/plugins/. These are awesome, and let you graph service performance like SQL and HTTP(s) response times. Supports custom queries as well!
Default Alerts
This one is easy. In LibreNMS, go to Alerts > Alert Rules, and press the “add default rules” button!
Now Onwards! [Ansible: From Install to Automating Installs] (Coming Soon!)
