In this post, we’ll be covering the greenfield deployment of an Azure Virtual Desktops environment, publishing a RemoteApp, implementing scheduled scaling of the virtual machine infrastructure to control costs, and securing access to these resources with Microsoft MFA and Conditional Access policies.
Our scenario is this: we are building a solution for three remote offices who total 25 employees among them. These employees all need access to a central enterprise application, which we’ve chosen to run in the Azure cloud due to ease of geo-redundancy and reliability scaling. The high-level system design we’re working with:

We will begin by deploying the the Azure Virtual Desktop Environment.
Entra ID Groups
We want to begin by making two security groups in Entra—a group for the users who will be utilizing the AVD system, and a group who will have administrative access to the AVD virtual machines when they connect. The former will comprise our 25 users from the demo, and the latter will be IT support team members who need administrative access to the VM’s.
Create the Security groups:
- DEVOPS
- ADMIN
Make sure when creating them, that you check the box for “Allow Azure role assignment”, as we will be making use of this feature later.
Place your regular users in the user group (DEVOPS) and your IT support staff in the administrative group (ADMIN).
Azure Resource Group and Networking
Go into the subscription where your resources will live—I am using our Lab subscription.
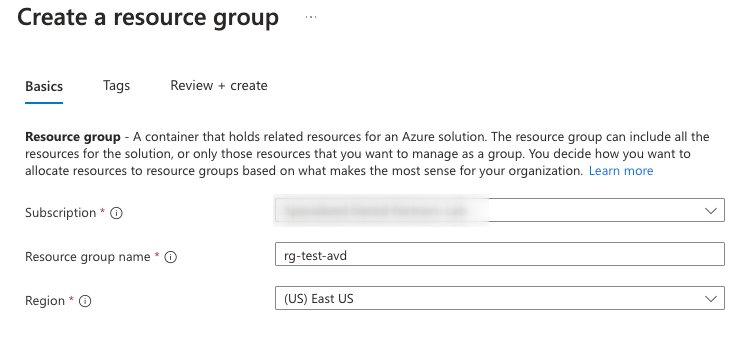
Create a resource group, named rg-test-avd. Select the correct region—you want to make sure that you use the same region for all resources in this group as we go, as Microsoft is not really good about selecting the correct region when provisioning and seems to default to East.
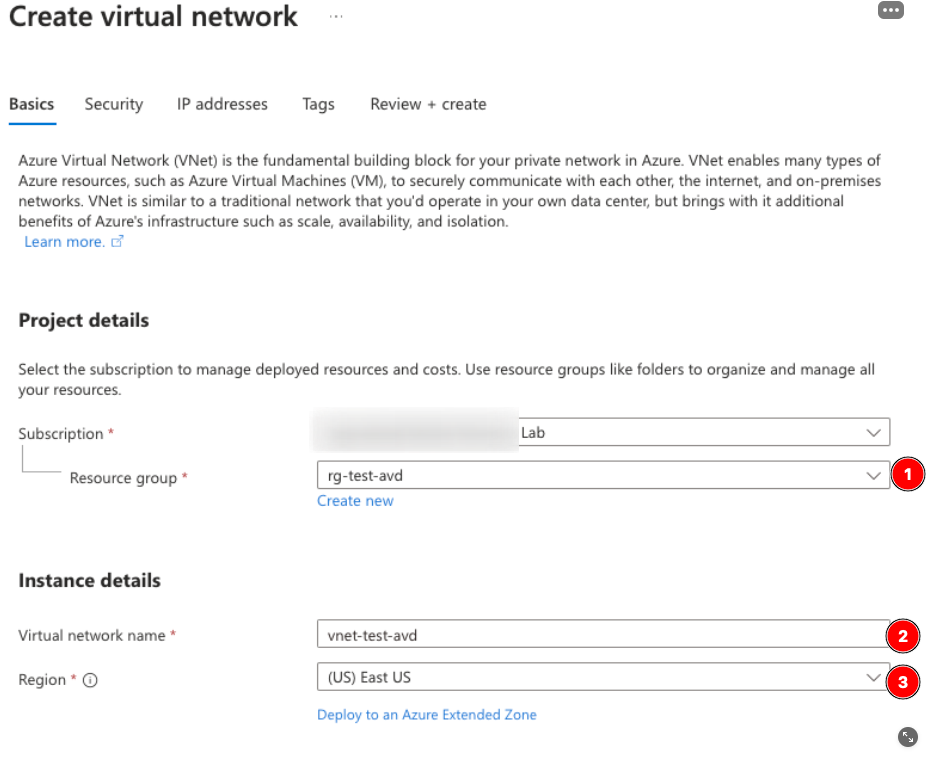
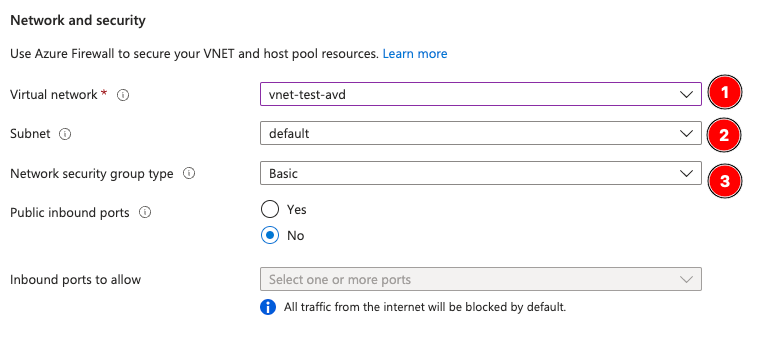
Next, make a Virtual Network called vnet-test-avd. Make sure to select the correct Region here as well!
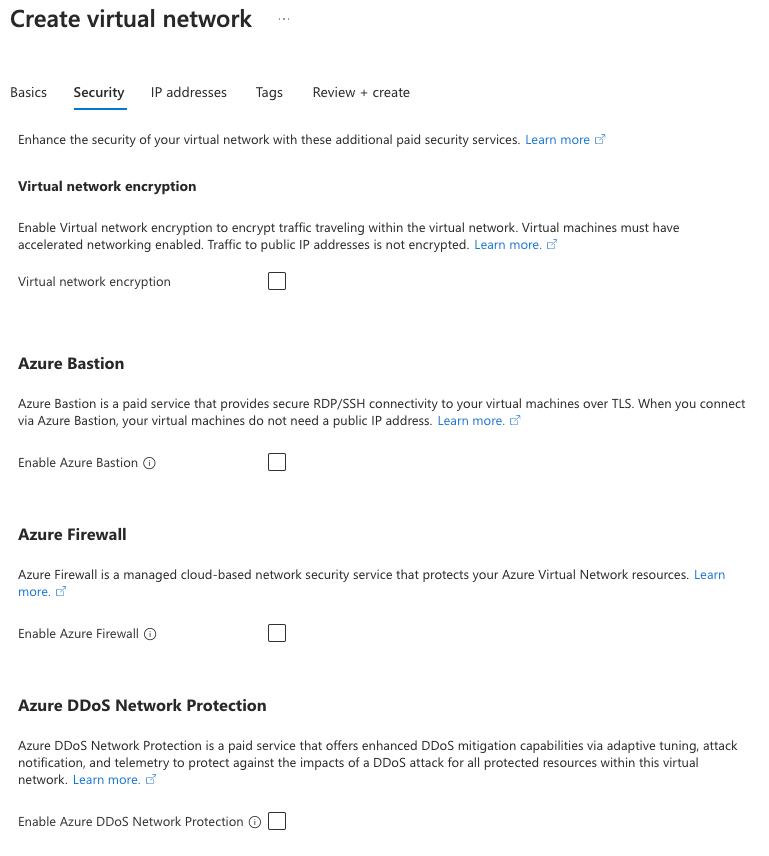
Under Security, it will prompt you to add resources. We have a plan for these and will add them later if needed, but you do not need them for this functionality to work. Remember, we are publishing applications out of this infrastructure, so the virtual machines do not need broader internet access.
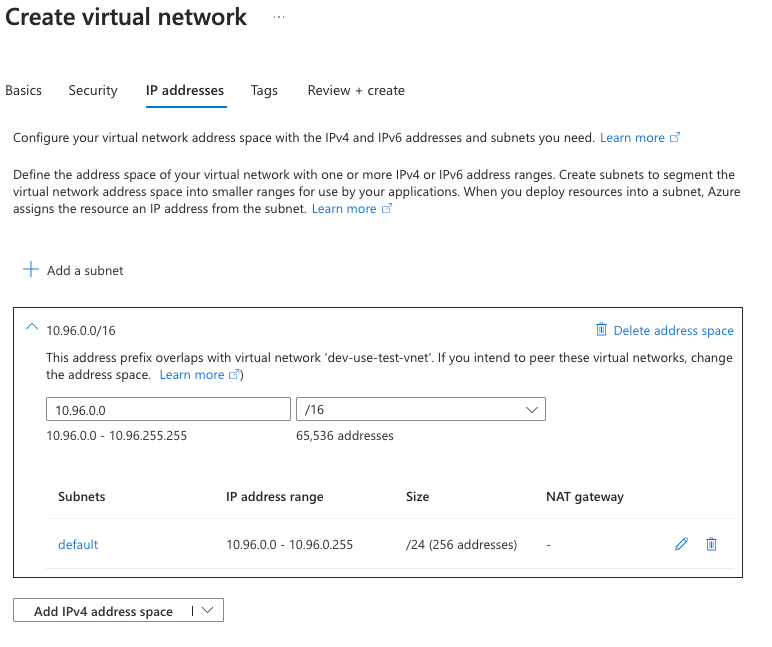
Under IP addresses, we set up the scoping and subnets.
For this lab, I am using a supernet of 10.96.0.0/16, and since we only need one subnet, I’m going to leave the default subnet (10.96.0.0/24). You likely will want to at least rename your subnet to something like snet-test-avd to keep a consistent naming standard.
Now hit Review + create.
Azure Virtual Desktop Host Pool (VM creation)
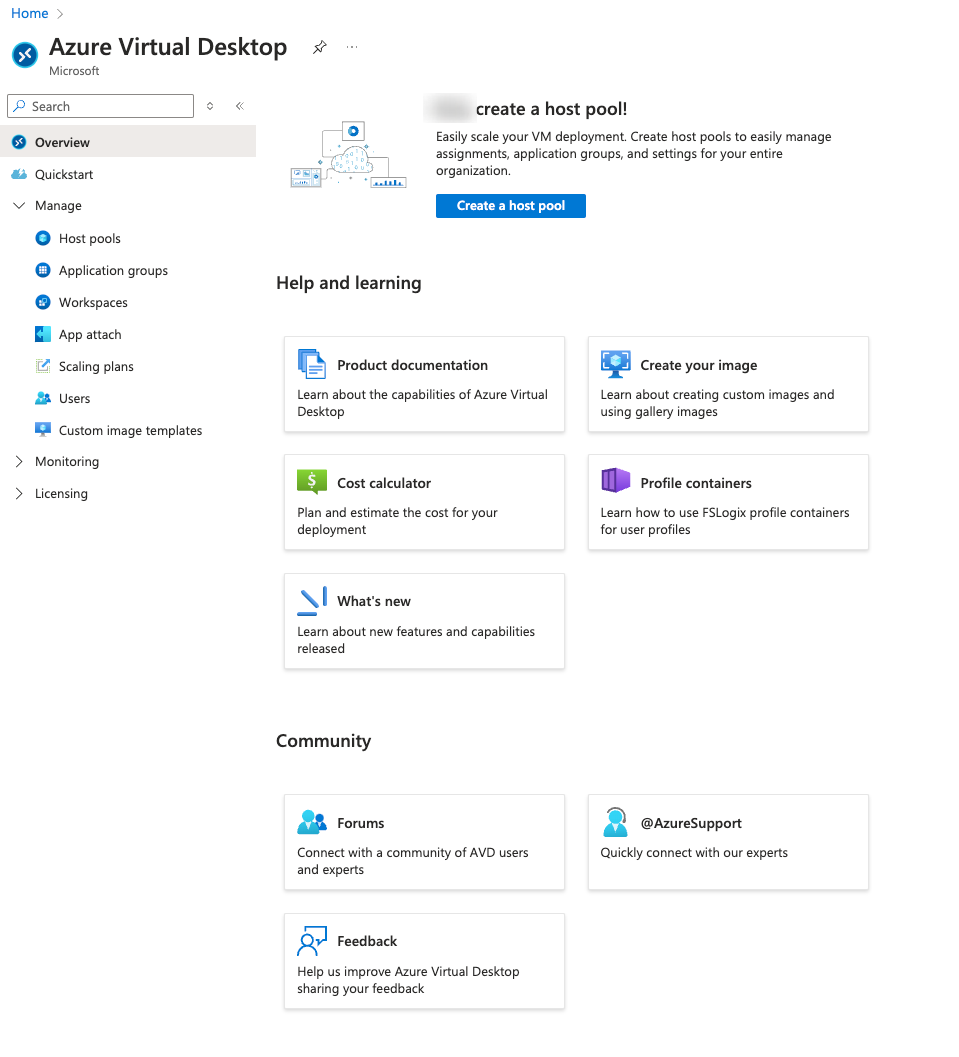
Switch to the AVD blade now—the fastest is usually via the Azure Portal search.
You’ll be brought to the AVD Overview page:
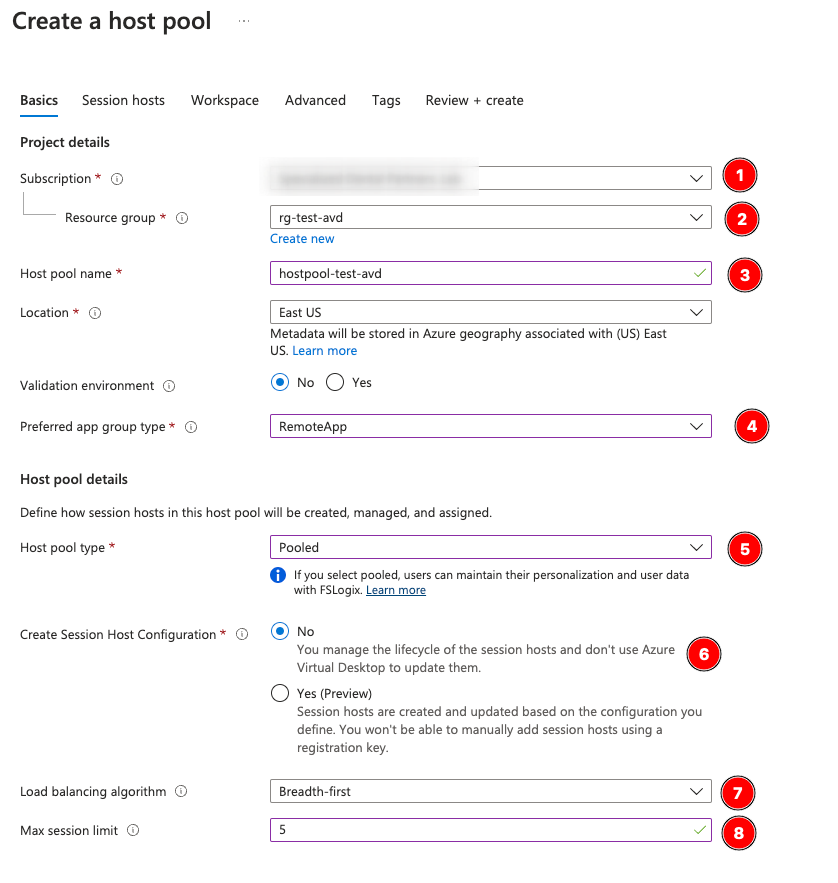
Go to Host pools > Create:

Select the resource group we made earlier, name your hostpool, and validate the Location is correct. You’ll notice here (4) we select RemoteApp—if you’re doing a full Desktop deployment, leave it on Desktop, but since we’re deploying a simplified application to our audience we chose RemoteApp.
For Host pool type, we chose Pooled. If you want dedicated, assigned VM’s per user (like a full desktop replacement with guaranteed resources), leave this on Personal, but for 90% of applications out there you will likely want a Pooled environment. Even if your users are using Pooled virtual machines, their data can be preserved using FSLogix (covered in future posts), but for a simple application which has no unique environment data for the user, we’ll leave it alone.
In (6), I chose No to session host configuration—we are going to be moving to a golden image for these desktops (future post), but feel free to test SHC. While it is in Preview, it appears to work well for certain use-cases.
For the Load Balancing Algorithm (7), select Breadth-first if you want your users to be assigned to the least-populated virtual machines first. If you want to load up hosts one at a time use Depth-first. Since we will be using schedules to manage virtual machine pool utilization, this setting has little effect now.
Max session limit is something you want to plan based on the hardware available; I will cover sizing later, but for this example set it to 5. This is equivalent to max concurrent users but includes stale sessions if you don’t force timeouts or logoff.
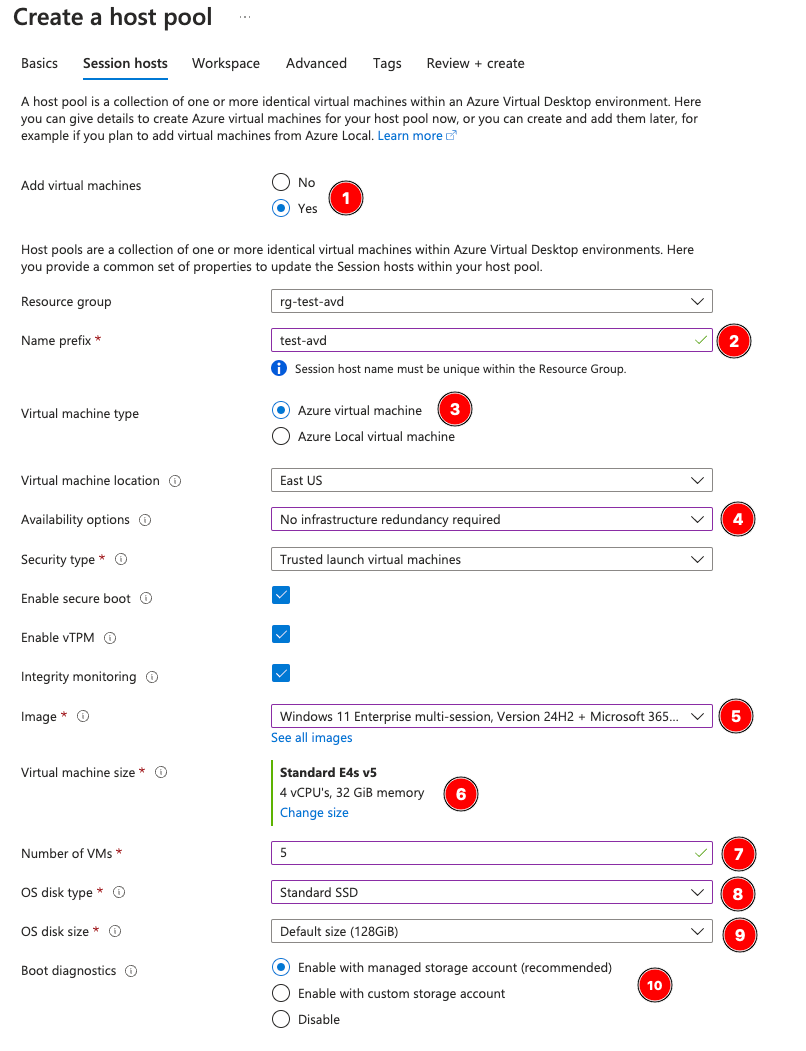
Next, the Sessions Hosts tab.
Name prefix should match your naming convention—when the pooled virtual machines are created, they will be named “test-avd-0”, “test-avd-1” etc since I set the prefix to test-avd here.
Virtual Machine type will be Azure Virtual Machines. Note, if you are running an Arc-enrolled Azure Local instance as a hypervisor on-premise, this is how you would integrate your on-premise hardware to AVD in the cloud.
Availability Options: select them if needed. Availability Zones is a good thing to use for this infrastructure, to provide some datacenter-level reliability, but it is an additional cost. You can in theory orchestrate additional capacity pools in another region to offset this later on, but for this example I turned it off.
Unless you have a business need for it, leave Security Type set to trusted launch virtual machines, and leave secure boot/vTPM/integrity monitoring enabled. These are protections provided for free at the OS level that should be used everywhere.
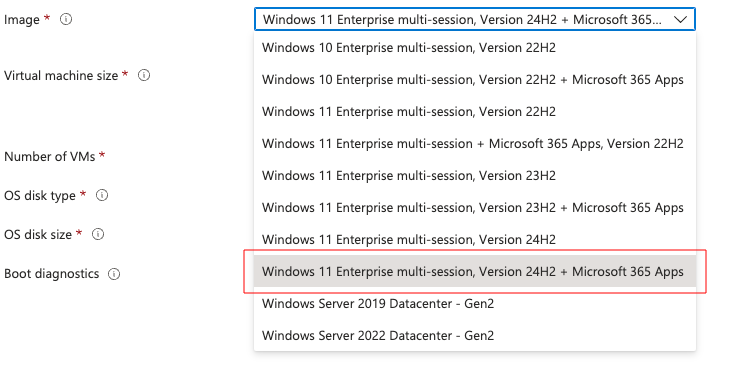
For the virtual machine image, unless you have a need for something older, choose the latest VM with or without office as you need, especially if you’re publishing with RemoteApp and not providing a full desktop experience. Since I’m publishing Microsoft Word and our enterprise app needs Word to function, I chose the Windows 11 Enterprise 24H2 image with Office 365.
Custom images would be selected here, but for the demo we’re using a prebuilt. Post incoming on custom images and how to tweak this setting after the fact.
Virtual Machine Size:
This is a complex topic. Which vm size you choose has to do with a number of measurables such as:
- CPU idle time
- Processing peak needs
- App multithreading needs
- Total number of simultaneous sessions (we set 5 earlier)
- Graphics needs
- IOPS needs
- Full Desktop vs Application Publishing (yes, RemoteApp does require less, though not much)
- Regional availability
- Quota availability
The right way to size this is to test and monitor performance. However, I’ve found a good rule of thumb is to take the number of simultaneous sessions you set earlier (5), then round down to the next even number (4) to get your multiplier.
Amount of vCPU = (multiplier), using D series for simple RemoteApp and E series for full desktop sessions
Amount of RAM = (multiplier) * 8gb, though with simple applications a RemoteApp session may be able to halve this.
For example, we use e4s_v5 (4vcpu 32gb ram) for 4-5 simultaneous full desktop users on each virtual machine, or D2ds_v5 for RemoteApp-only pools. While D-series are ubiquitous, we’ve found that securing E series without an enterprise agreement with Microsoft takes some planning and working within quotas to validate what’s available on a region-by-region basis. For example, while you will see e4s_v5 referenced here, in US East they are restricted enough that we ended up deploying with D-series later on (took Microsoft 24 hours just to allow 10 more E4S cores for our pay-as-you-go subscription).
OS Disk Type, we’ve found Standard SSD is fine for RemoteApps but Premium SSD will give an excellent full desktop experience. It’s more pricey, though, and that cost does not get cut when the AVD host is deallocated (like virtual machine size does).
OS Disk size should be fine on default unless you need to store lots of data on the C:\ drive; RemoteApp should be fine with this.
Here is an example of all of the OS images available by default as of January 2025:
 ‘
‘
Here we are selecting E4s_v5. Warning, this will NOT validate regional availability or quota!

Inbound ports to be opened can be set, but don’t do this. It’s bad security practice. If you need data transited from on premise to these virtual machines, instead build a VPN tunnel as we’ll go over in future posts.
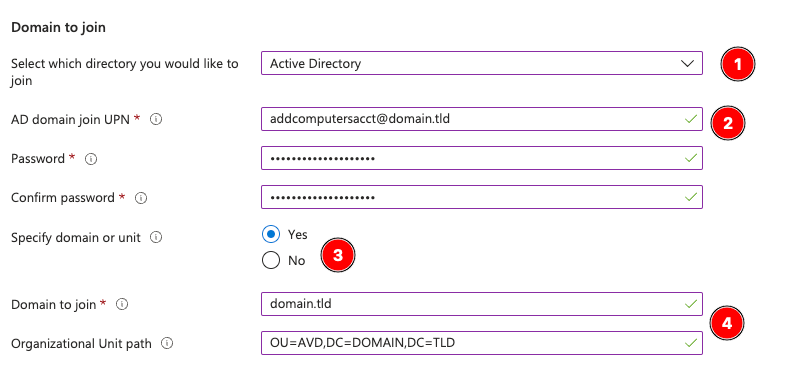
Domain management of the machines is next. If you have an Active Directory deployment, you would fill it out like so:
We instead opted to use Entra ID for SSO with Intune enrollment:

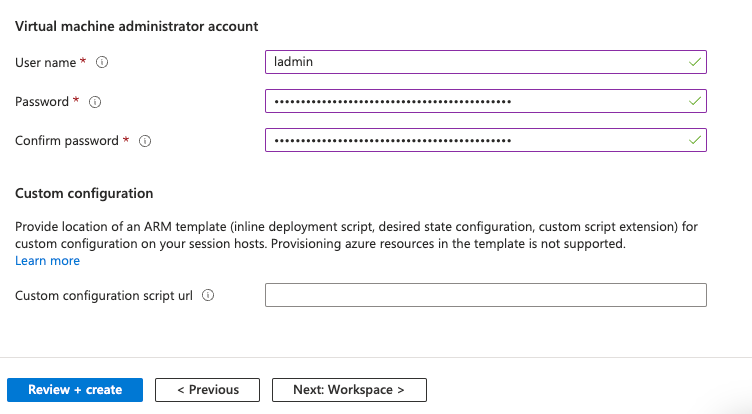
Set up the local administrator account on the virtual machines (make sure to store this somewhere as it’s not retrievable later on):
Next, skip the workspace tab and hit Deploy!
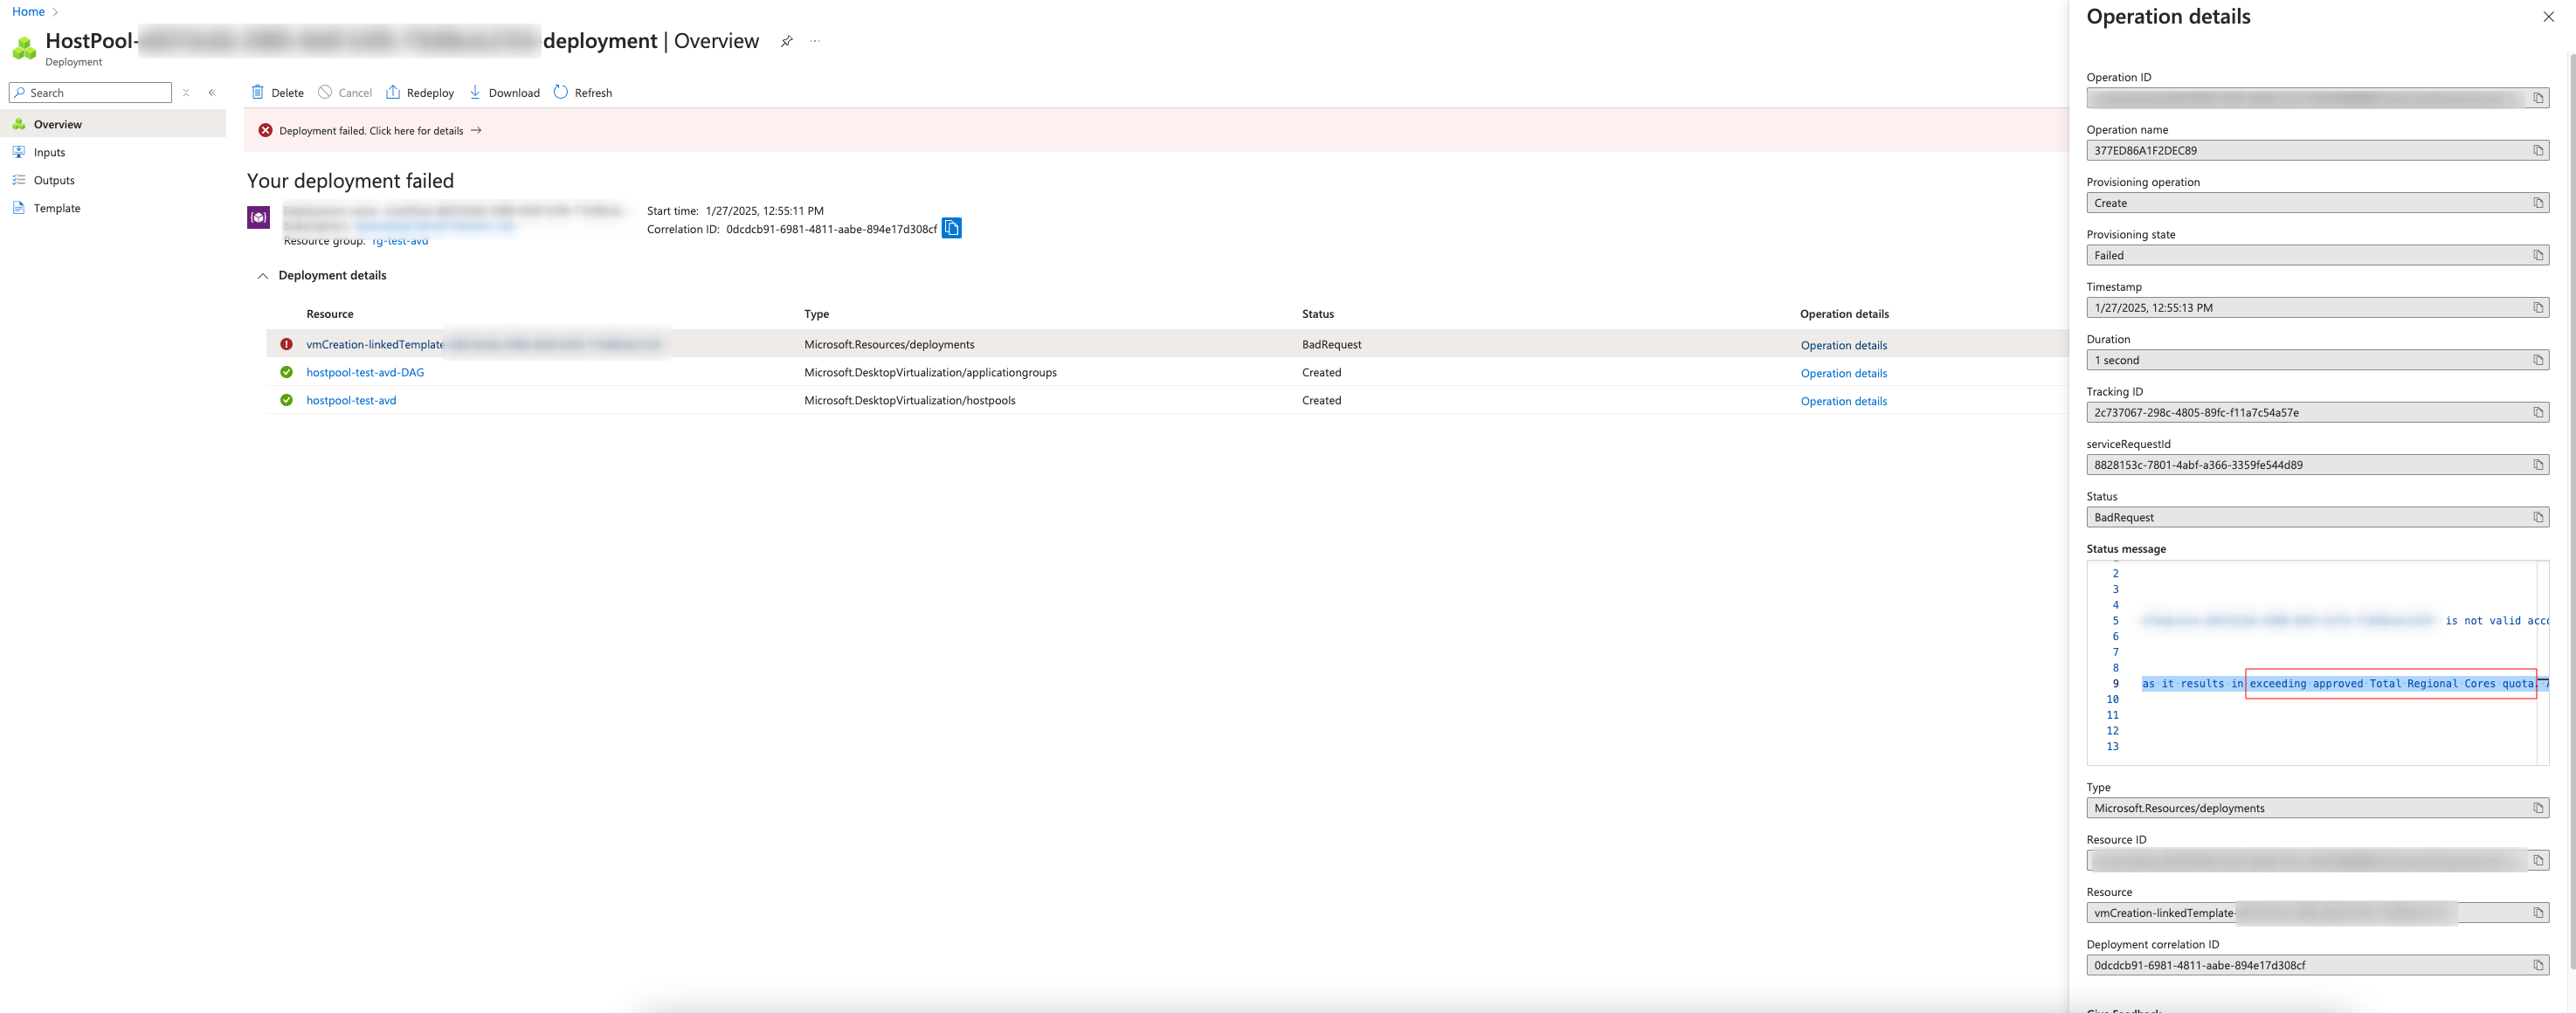
Note: Quotas
You might hit this—if so, fix your quota limits:
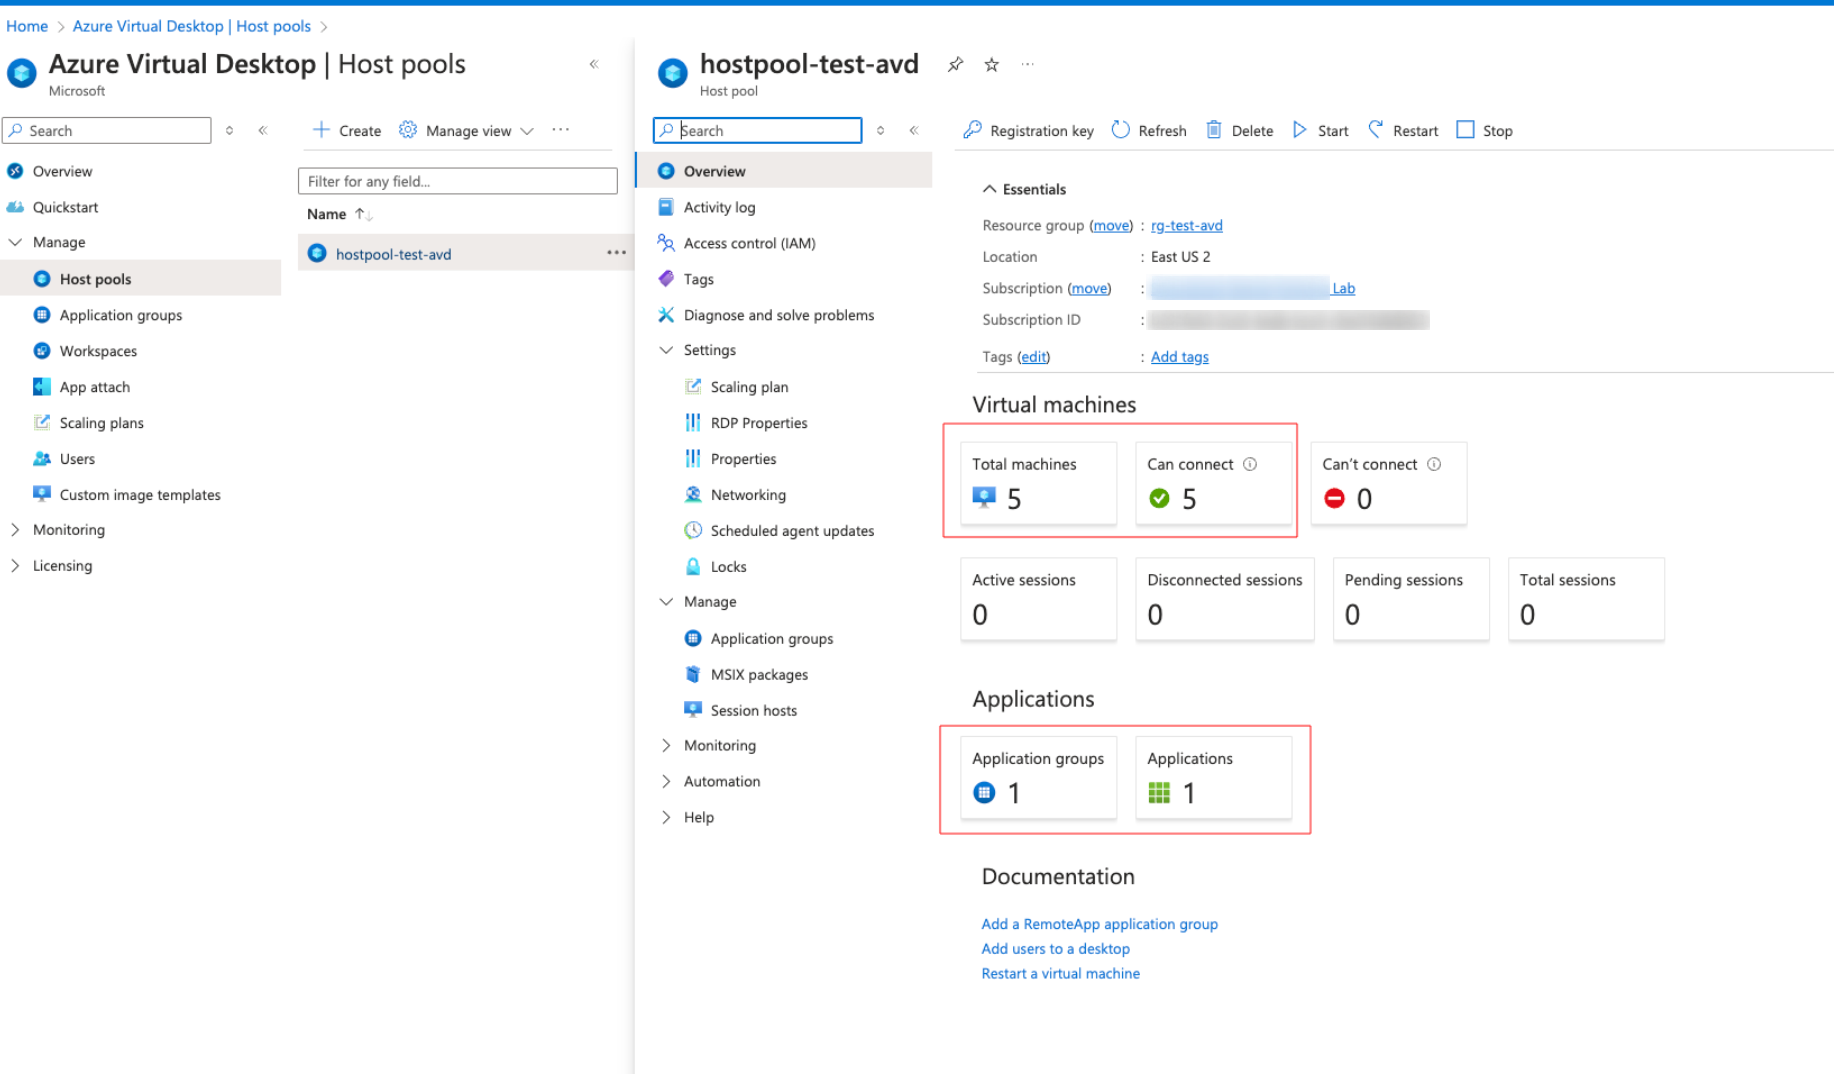
Now, we wait for the deployment to complete! For five machines, my deployment took 30 minutes.
You should verify like below that the Host Pool shows all machines can connect, and that the default Application Group shows up.
Deploy the Workspace and Applications
Click Workspaces, then Create.
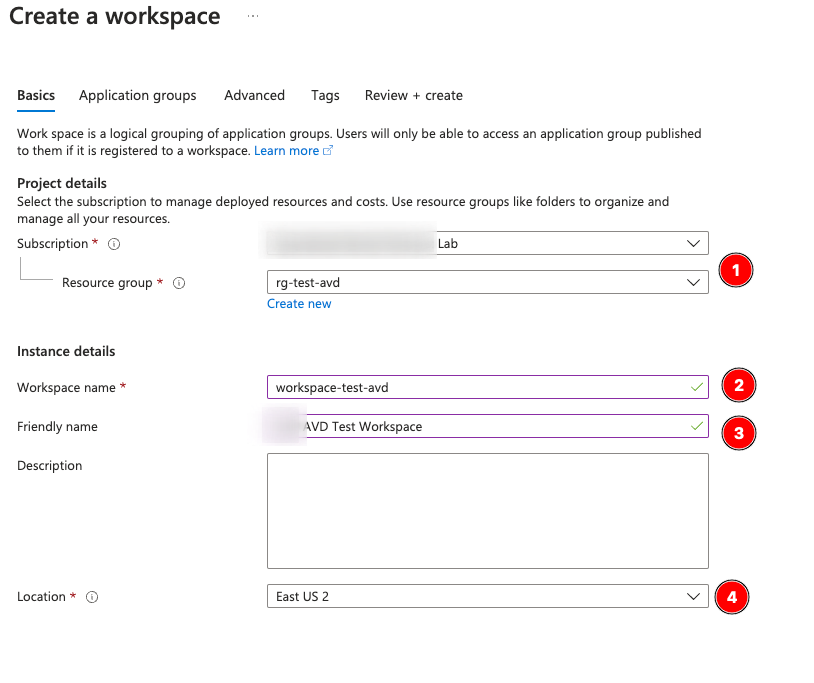
The workspace name should follow your naming convention, but the Friendly Name will show up to the end user as a “group” of the apps or desktops you push to them. Make sure it’s something representing the project or company because it is highly visible. Do not register the application group yet, just hit Review + Create after.
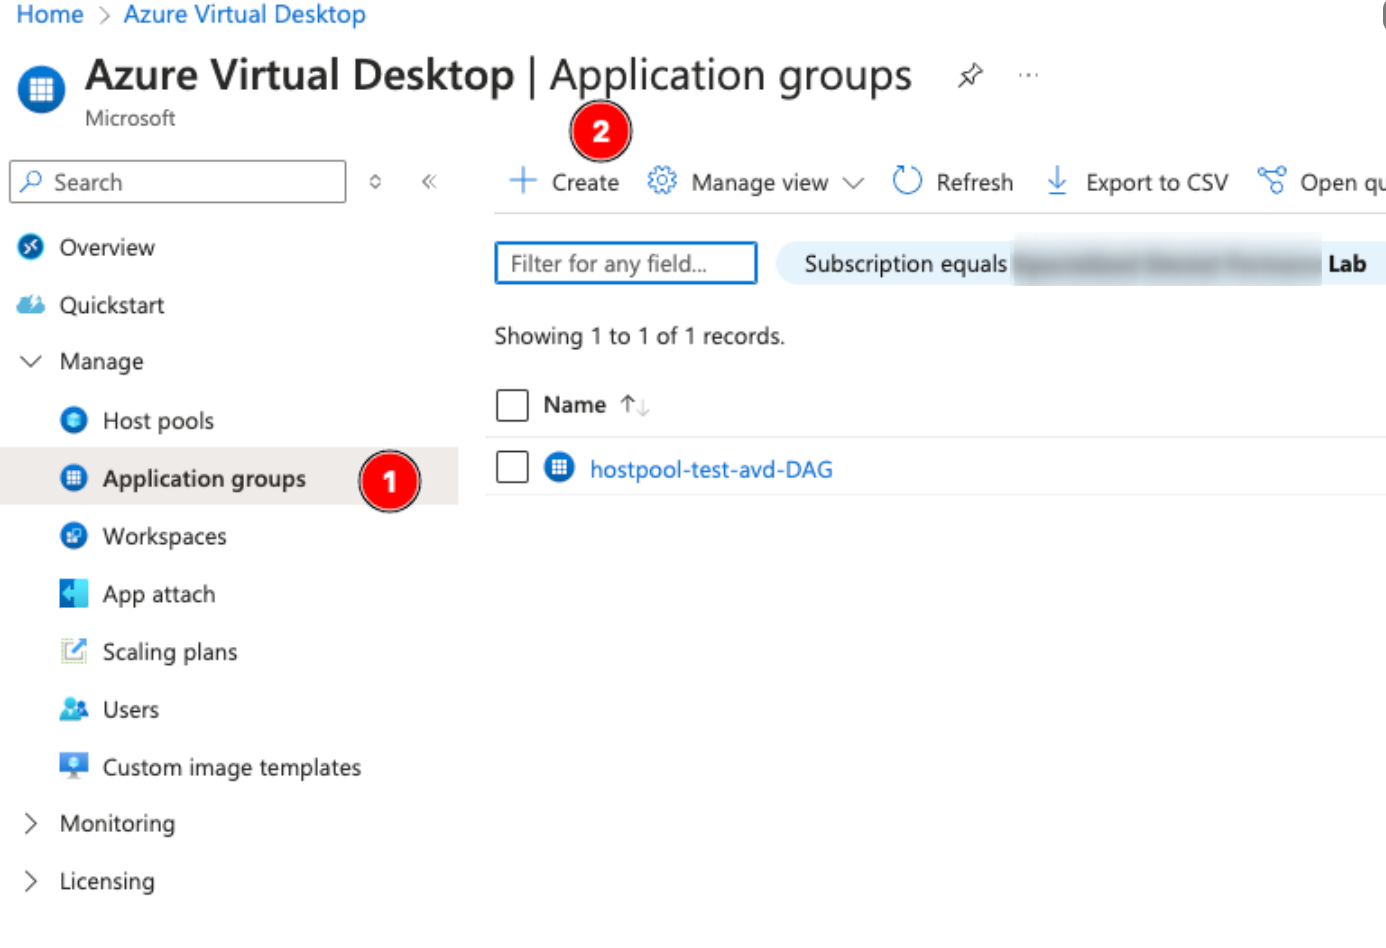
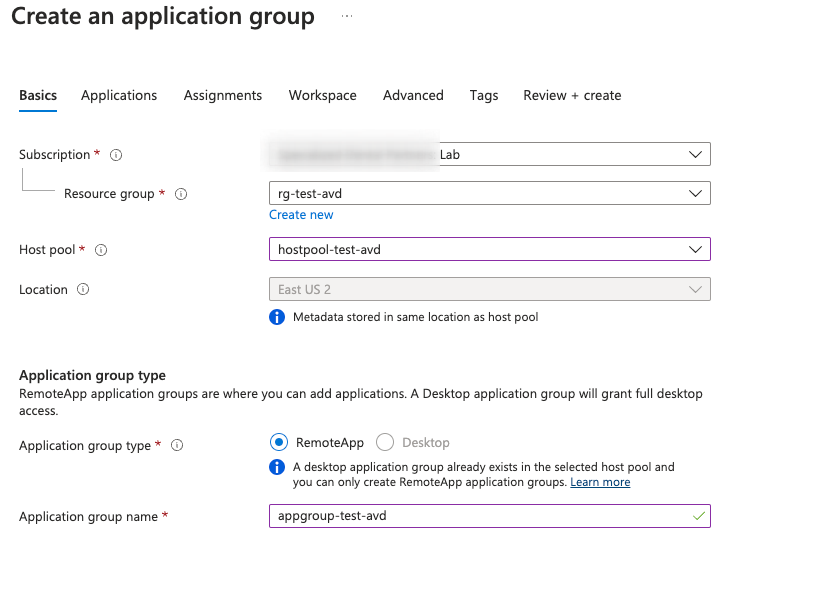
Now, go into Application groups. Create a new application group—the existing one is a default full desktop experience we’ll keep for administrative purposes.
Link it to the host pool we made earlier. Set the type to RemoteApp, and give it an application group name.
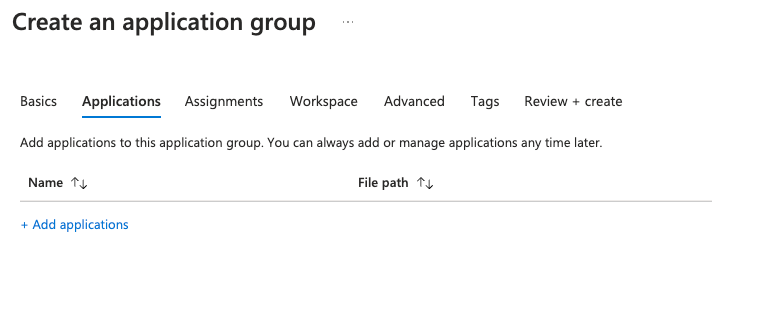
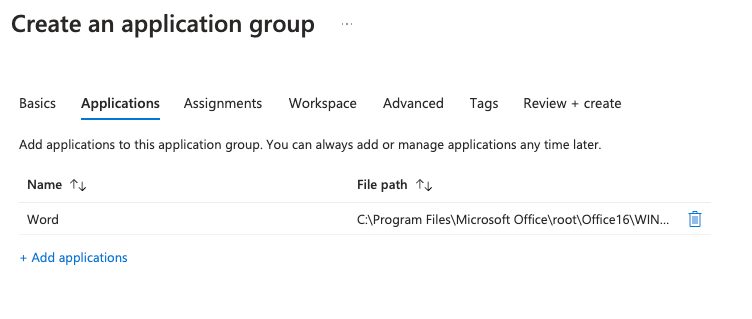
On the Applications tab, you can directly map the applications. For preinstalled apps like Office this is easy to do, and we’ll use Word as an example, but you likely will need to add your custom application later on.
Here is an example of publishing Microsoft Word:
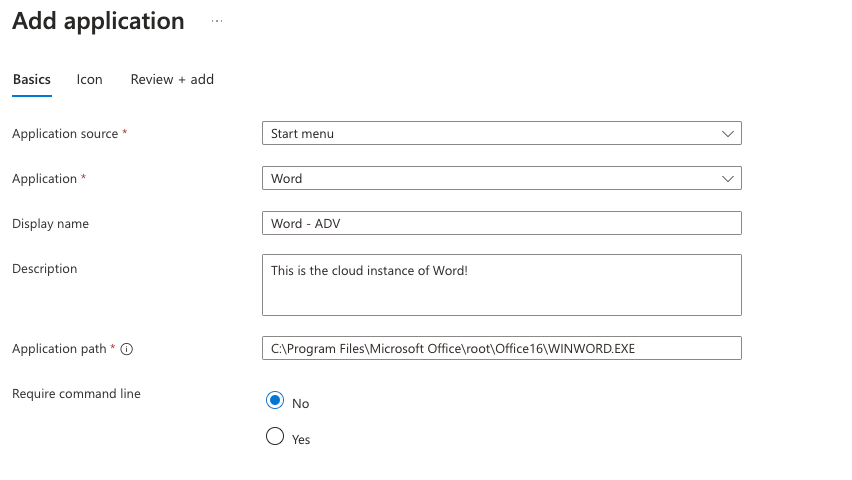
Note you indeed can do multiple applications per Application Group—think of App Groups as the “selection of apps your employees need”.
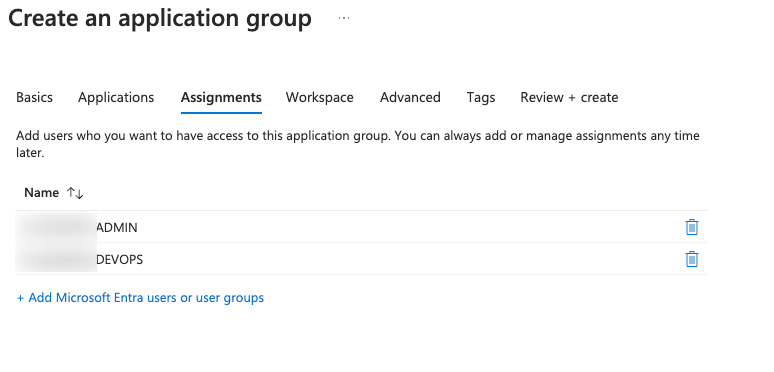
Under the Assignments tab, make sure to add both the user and admin groups (ADMIN and DEVOPS for us):
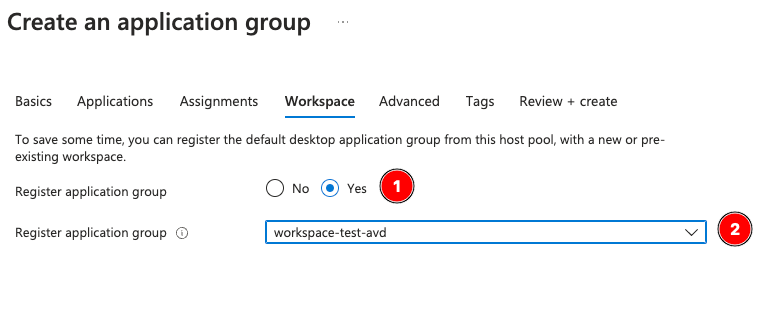
Link it to your existing Workspace from earlier:
Then Review + Create!
Roles and Permissions
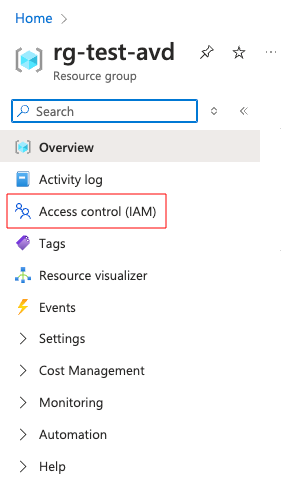
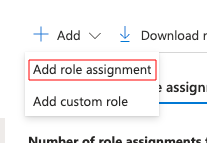
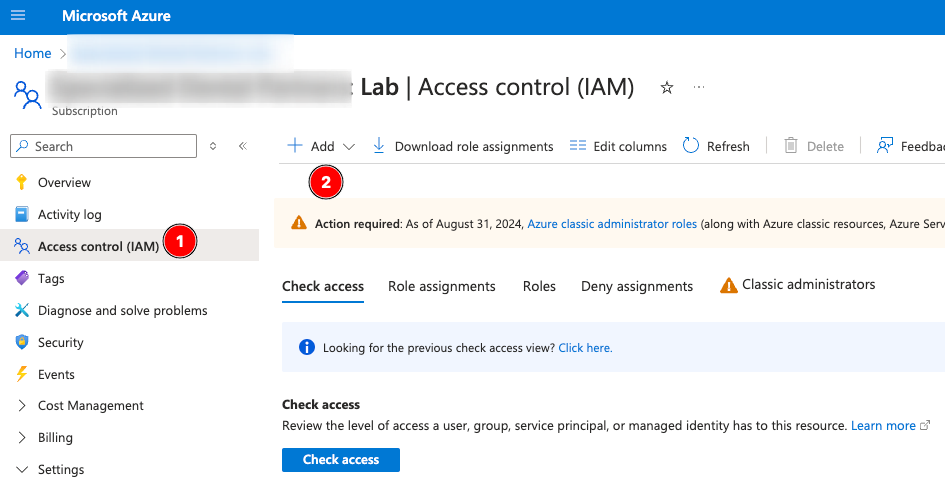
Navigate back to the Resource Group, via the Azure Portal. Select the RG, then go in the Access Control (IAM) blade on the left.
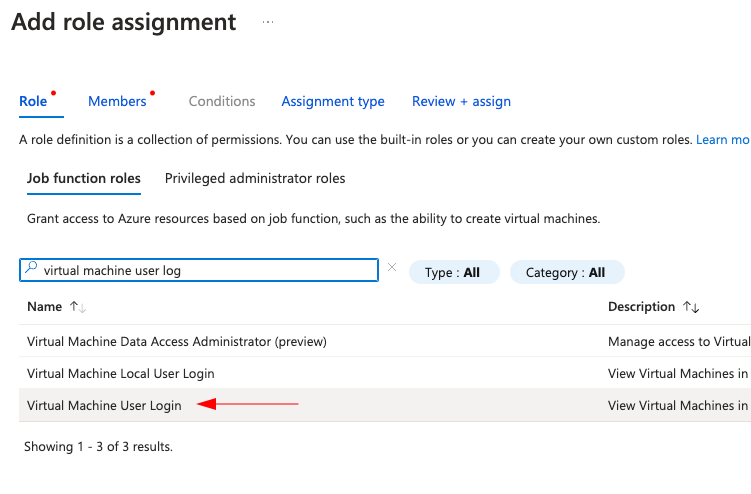
Add a Role Assignment:
First, select Virtual Machine User Login:
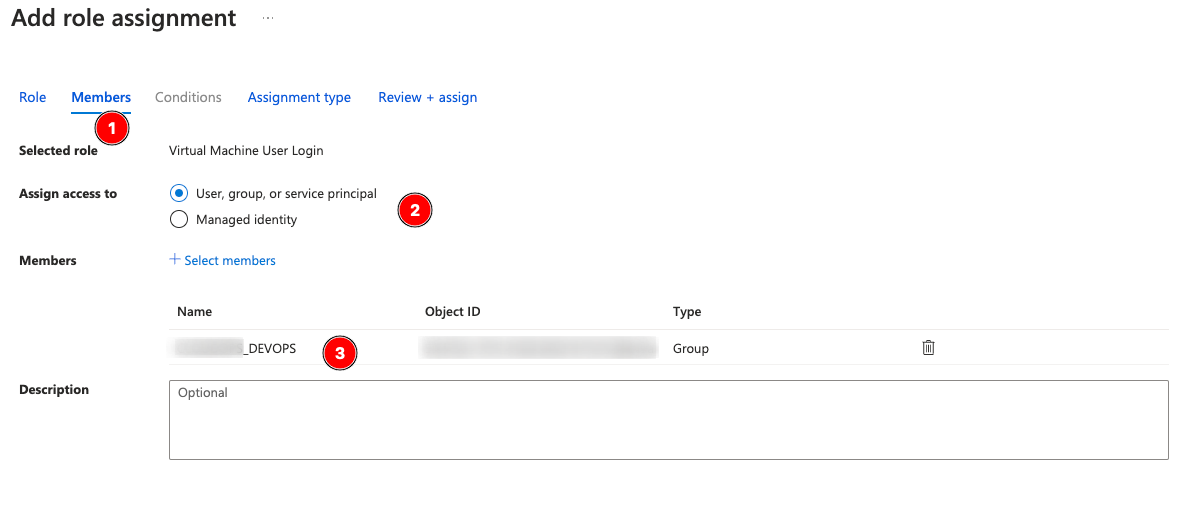
Select the Users group you made earlier, DEVOPS in our case:
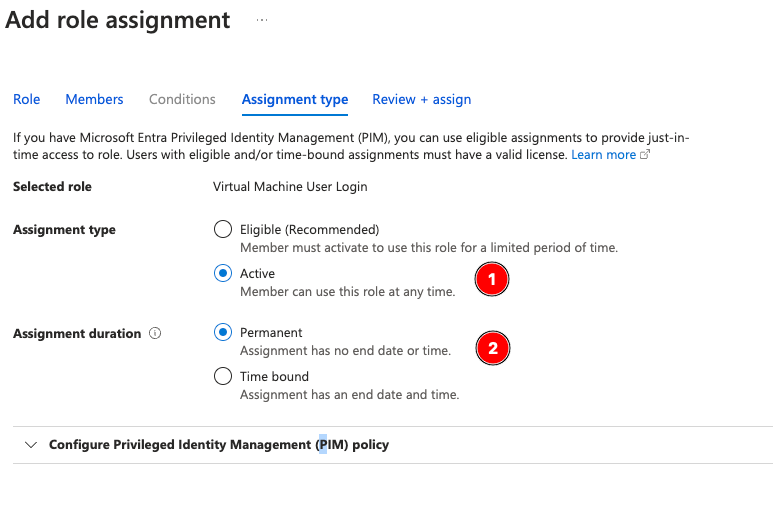
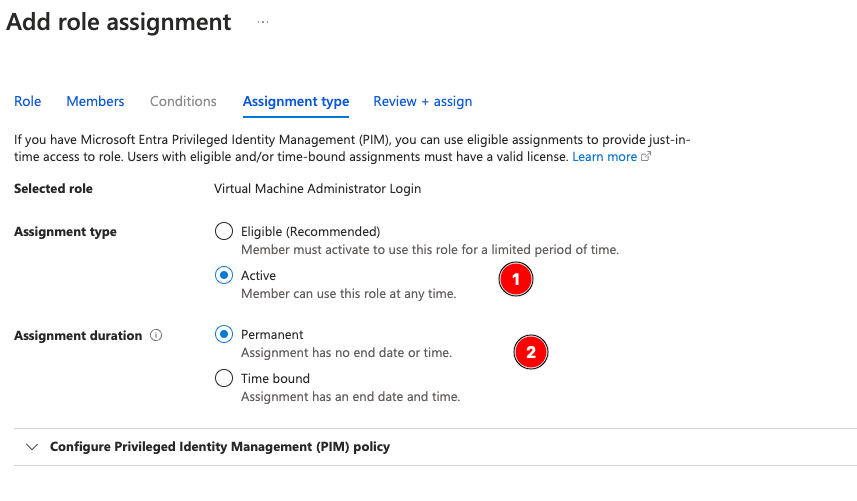
Set the Assignment Type to Active, Permanent unless your organizational policy says otherwise:
Now repeat the above steps for the Administrator access. Add a role assignment for Virtual Machine Administrator Login:
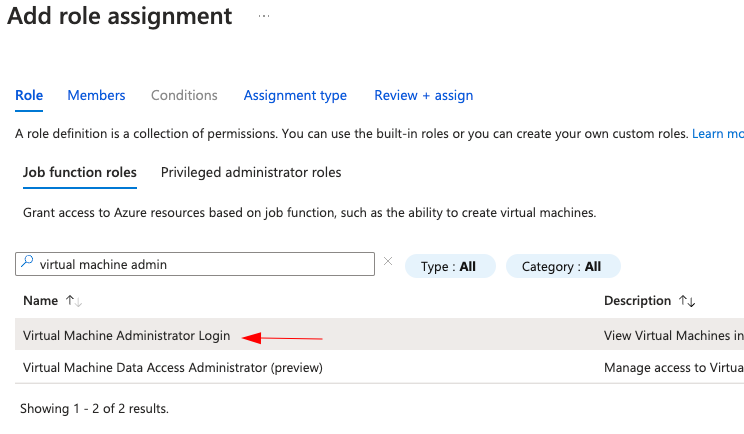
Select the admin group (ADMIN):
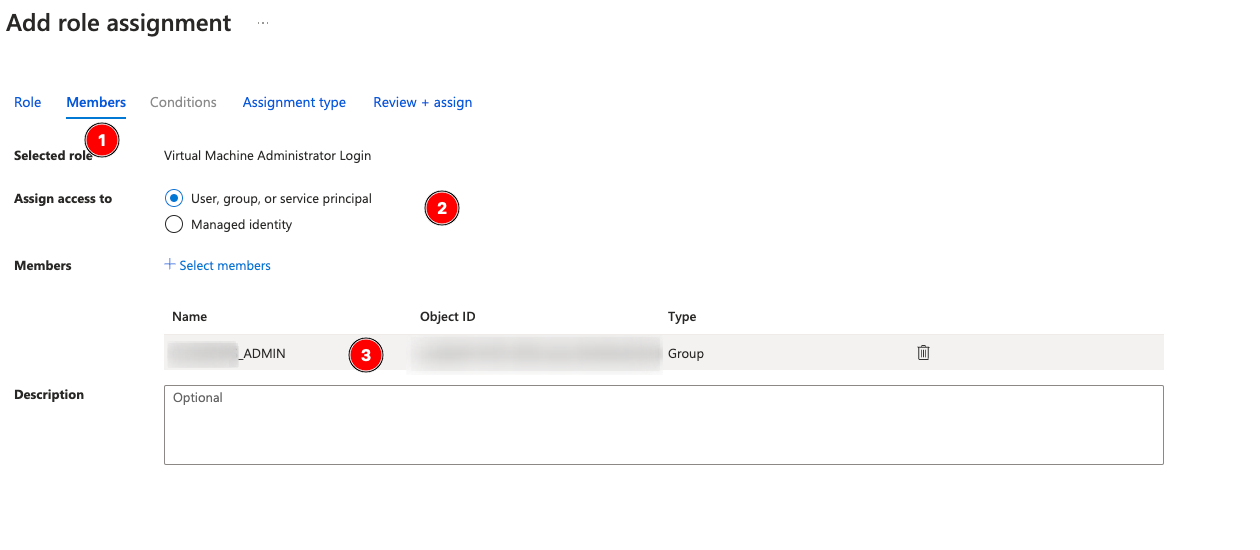
Set this to Active, Permanent as well:
Review + Assign!
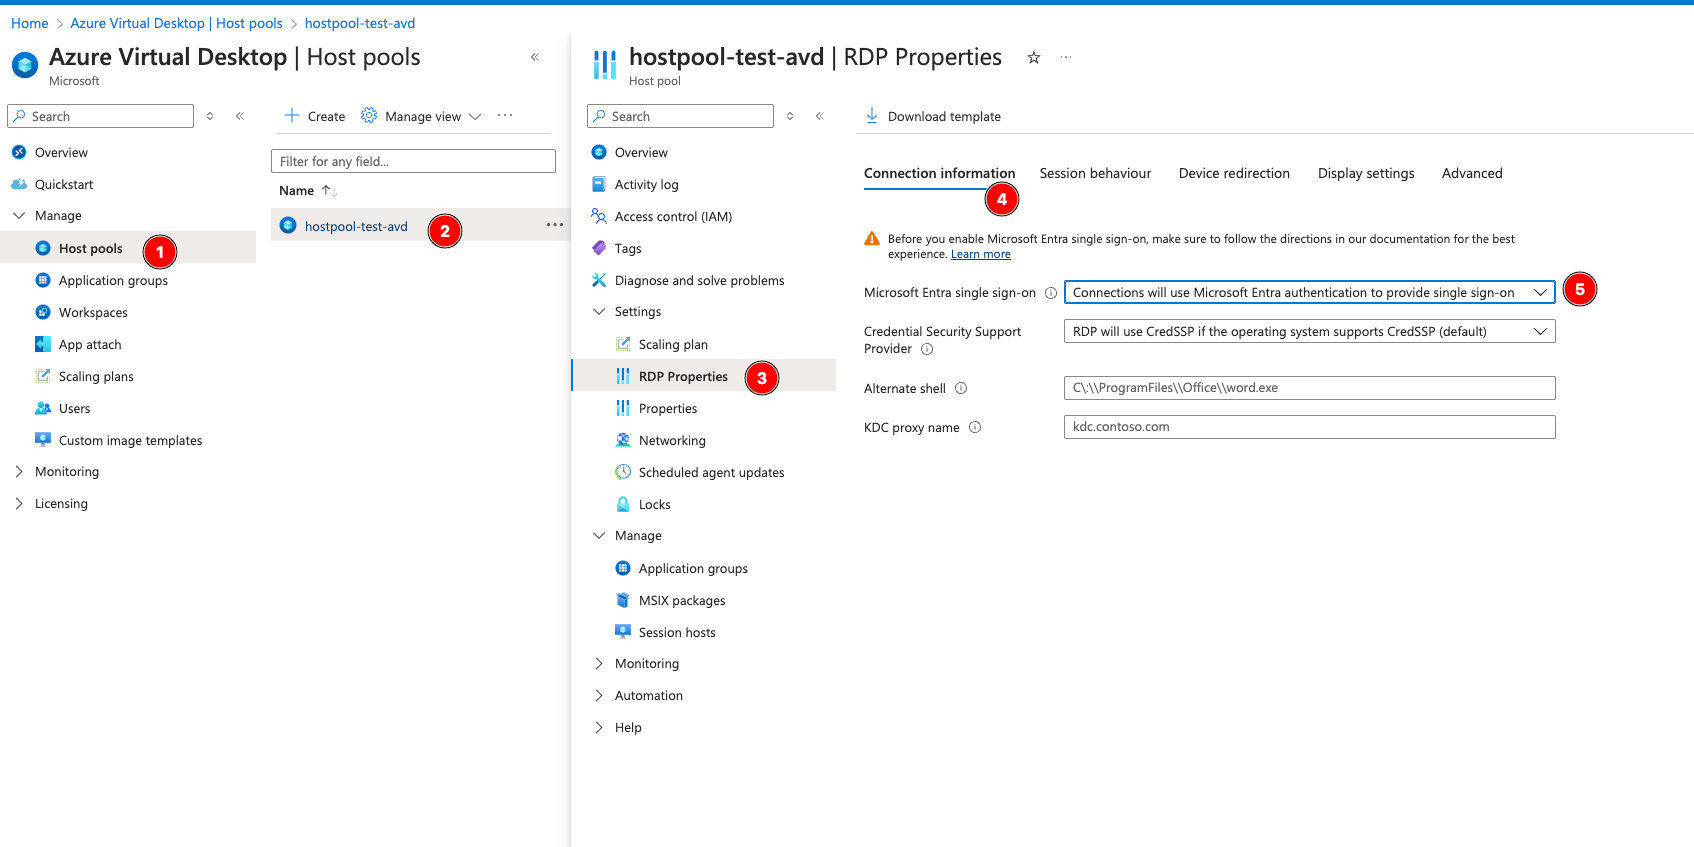
Single-Sign-On for Entra ID to the Host Pool VM’s
Head back to the Azure Virtual Desktops blade.
Go to Host Pools > your new Host Pool, then RDP Properties, and under Connection Information set Microsoft Entra single sign-on to use Microsoft Entra.
Virtual Machine Scaling Plan
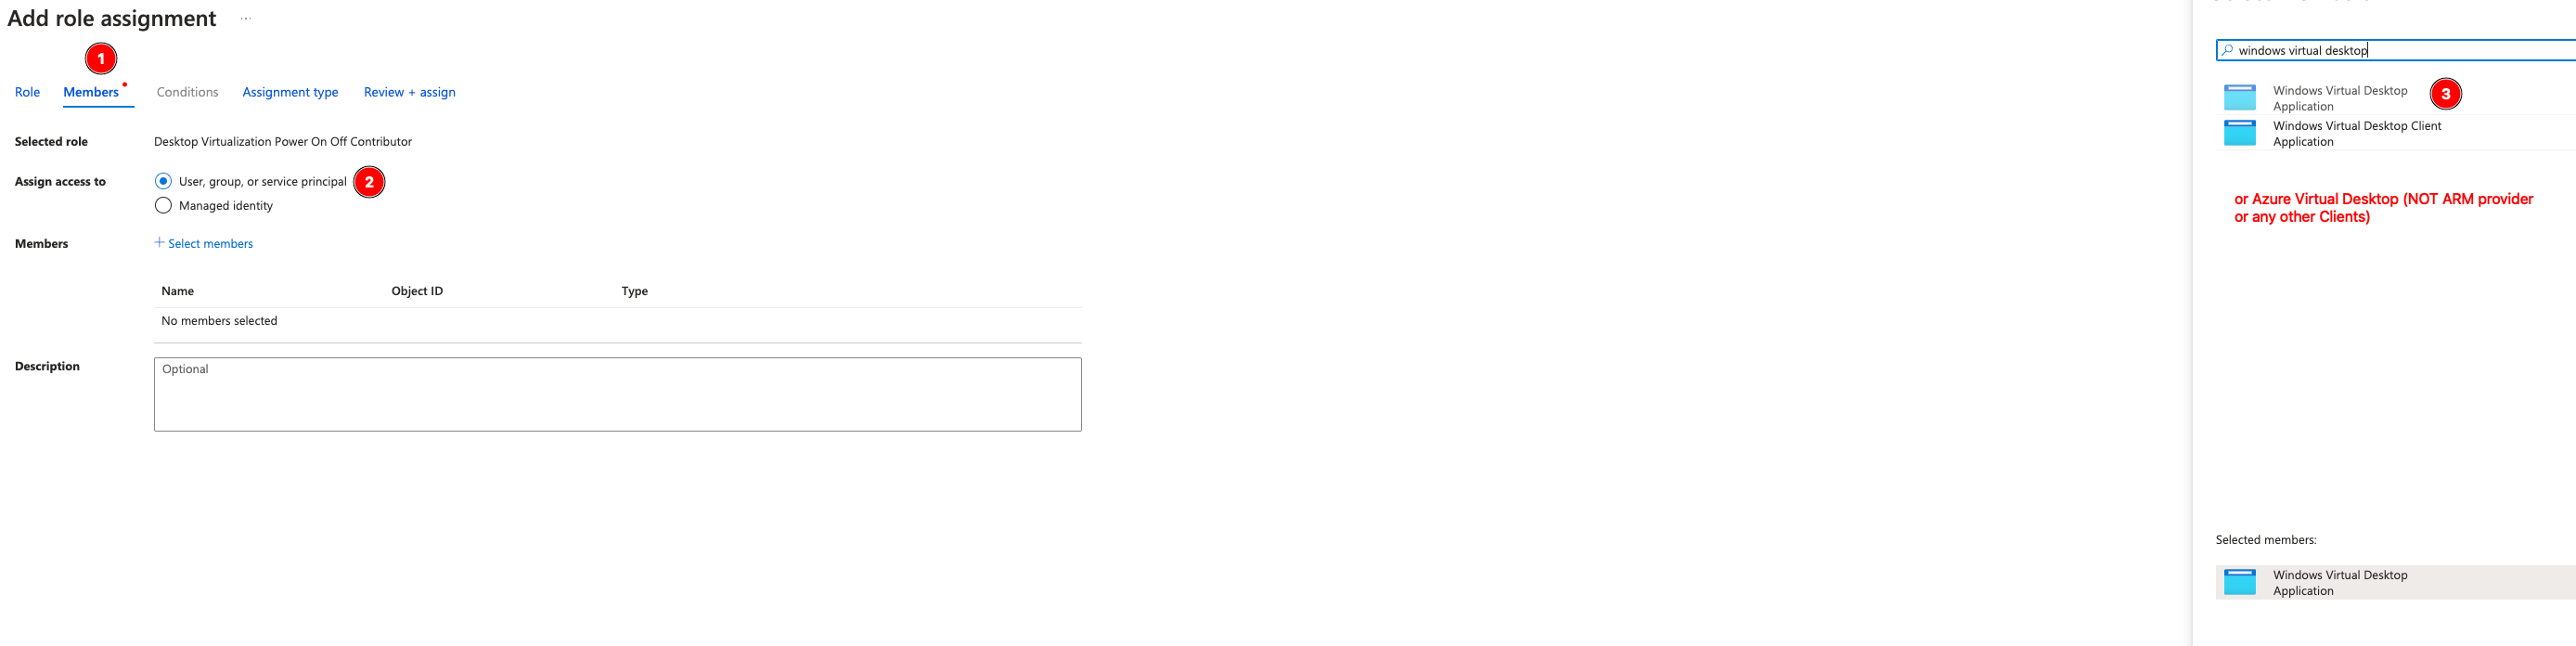
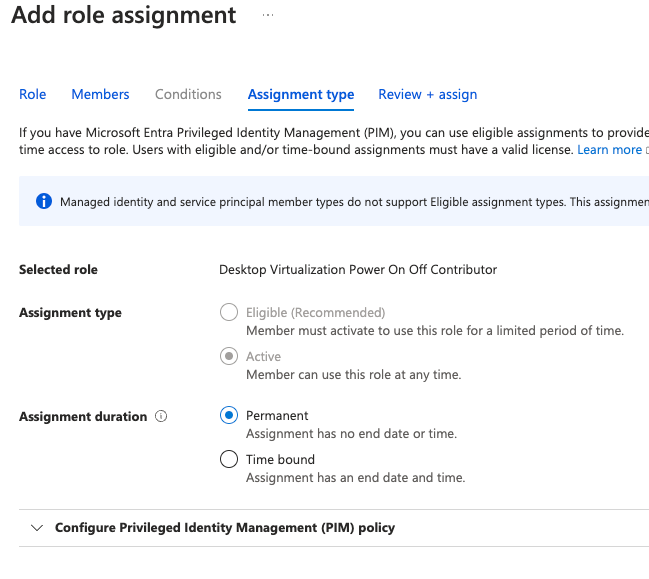
First, at the SUBSCRIPTION level, not the resource group or anything below that, go to Access Control (IAM) and add permissions for the Azure Virtual Desktop (may be called Windows Virtual Desktop) service agent to control “Desktop Virtualization Power On Off Contributor”:

This must be a permanent assignment, otherwise it can silently fail if you don’t have explicit alerts set up when the binding expires.
To validate, double-check that the correct service is assigned the correct permissions:

Now, go back to the AVD blade.
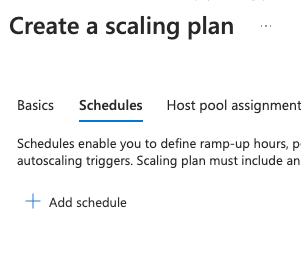
Go to Scaling Plans > Create:

Match the existing resources as we’ve been doing.
Note, the Time Zone is important if you are covering multiple regions—this plan will not adjust itself to the hosts local timezone.
Exclusion Tag: If you have hosts in your pool that you absolutely don’t want offline, make up a tag here and apply it to those hosts. An example of when you’d want to use this from Microsoft:
For pooled host pools, autoscale overwrites drain mode, so make sure to use exclusion tags when updating VMs in host pools.
Finally, choose Power management autoscaling. Dynamic is in preview and a bit buggy, and what you probably want can be achieved by power management instead.
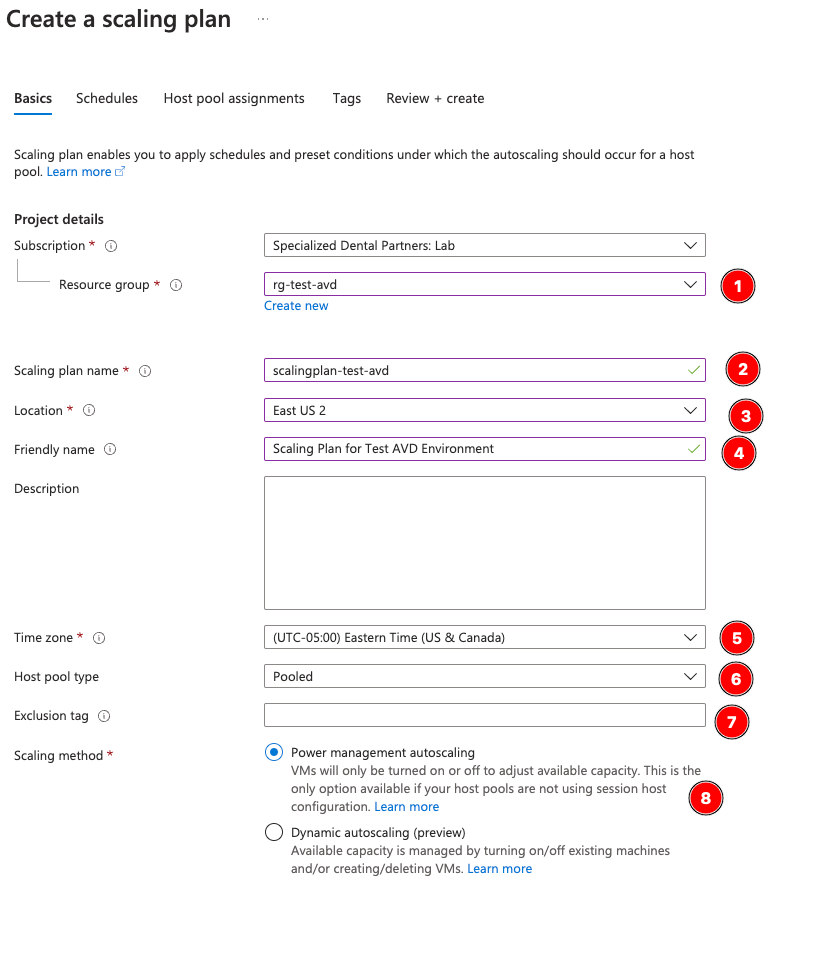
Make sure you select the right region! This doesn’t autofill correctly.
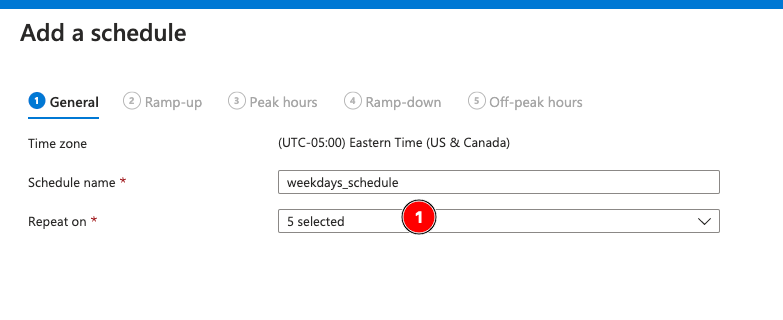
Now, the schedule itself! Set a different name and weekday schedule if you need. I’m simulating a 8am-5pm EST business Mon-Fri here.
For Ramp-up, I chose to begin ramp two hours before work to allow for an edge case where we may have need early mornings (when IT does updates for this particular system). We chose depth-first, because depth-first will load the resources inline and later on when we ramp down, will make it more efficient for shutting down resources.
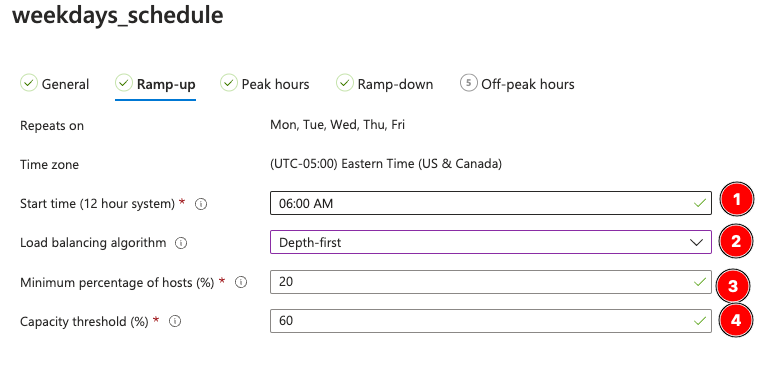
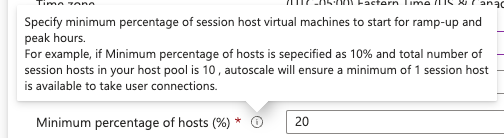
Minimum percentage of hosts is the number of Hosts (not sessions) that you always want available. Since we have 5 hosts, I chose to always have one online, so I chose 20%.
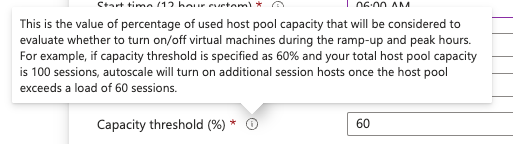
Capacity Threshold is the magic number. Remember that we have only a single host online in the morning (20%, see above); and since we set 5 sessions simultaneously, a 100% capacity measurement would be five current sessions. The setting below, 60%, means that when we exceed 3 sessions (60% of 5), we will power on another host. This means that during ramp-up time, it can scale capacity if my users for some reason are logging in early, but it will otherwise leave the hosts offline.
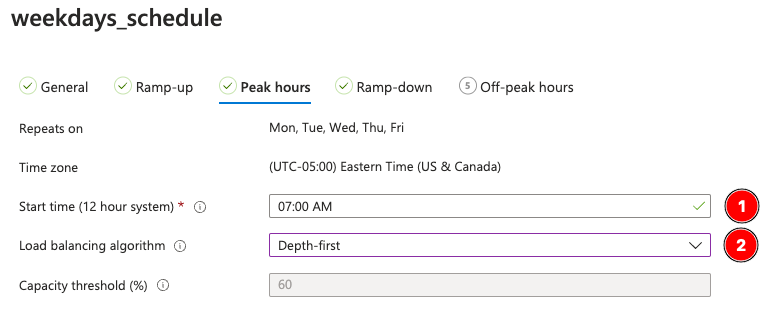
Peak hours is when you expect the majority of your users to be online. The only reason this exists in the schedule is to allow you to change the load balancing algorithm if you’d like. The reason you would do that, is because the schedule will power off machines during peak hours if 1) there are no user sessions on the machine and 2) if shutting off the host won’t reduce the available capacity to below the capacity threshold (60% below). If users sign off for lunch en masse, you will suddenly have several vacated hosts, which will power down until the users come back and try to reconnect—a way to fight this behavior if you have a mix of lunch rush is to move to Breadth-first load balancing which will ensure at least one user session is alive on each of the needed hosts, keeping them active over this temporary dip in utilization.
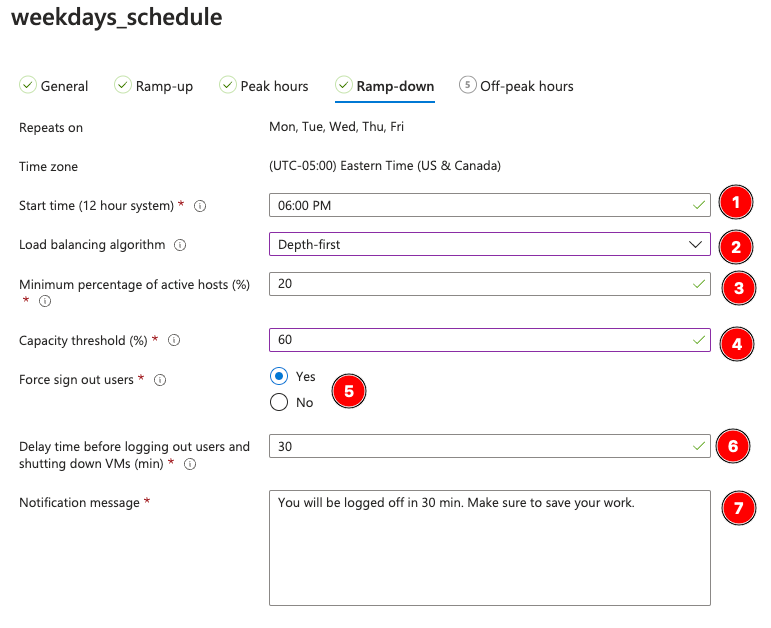
Ramp Down is near the end of the day, where you want to set settings to start vacating hosts and spinning down the infrastructure. In our case, I set 20% (one host) to always be on, but a capacity threshold of 60% so that there will be “less” of a need for session hosts to be turned on at the end of the day. I don’t use the more aggressive Microsoft settings (10% and 75% respectively) because we opted to use Force sign out users—so that our staff got notified it’s time to go. Note that our ramp down is 6PM, when the majority of our remote users have left 2 hours ago, so we felt this was adequate for our needs.
Off Peak is “night” for our schedule, and exists for the same reason we have Peak hours, to adjust the load balancing. For us, we rarely if ever expect night time use so we load up single hosts first with depth-first and otherwise let everything stay drained.
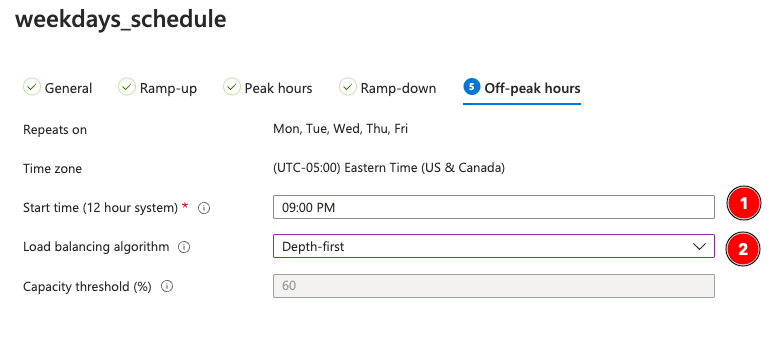
Note that because this hits off peak on Friday at 9pm and ramp up on Monday at 6am, it’ll be offline for the weekend except for 20%, or one, vm.
Take some time to walk through the Microsoft examples of how the scaling works to find a good schedule for your needs.
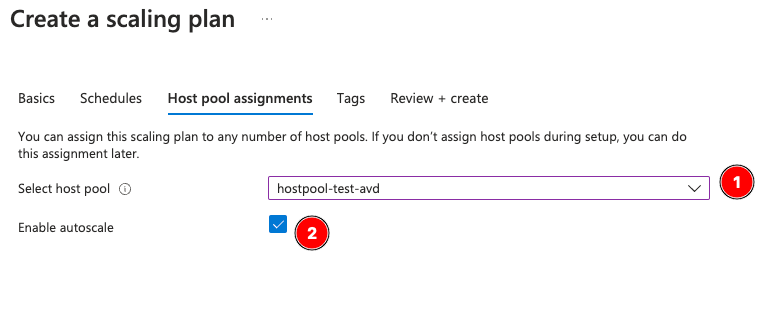
Now assign the plan (make sure to enable autoscale):
And Review + Create!
Multi-Factor Authentication for AVD Access
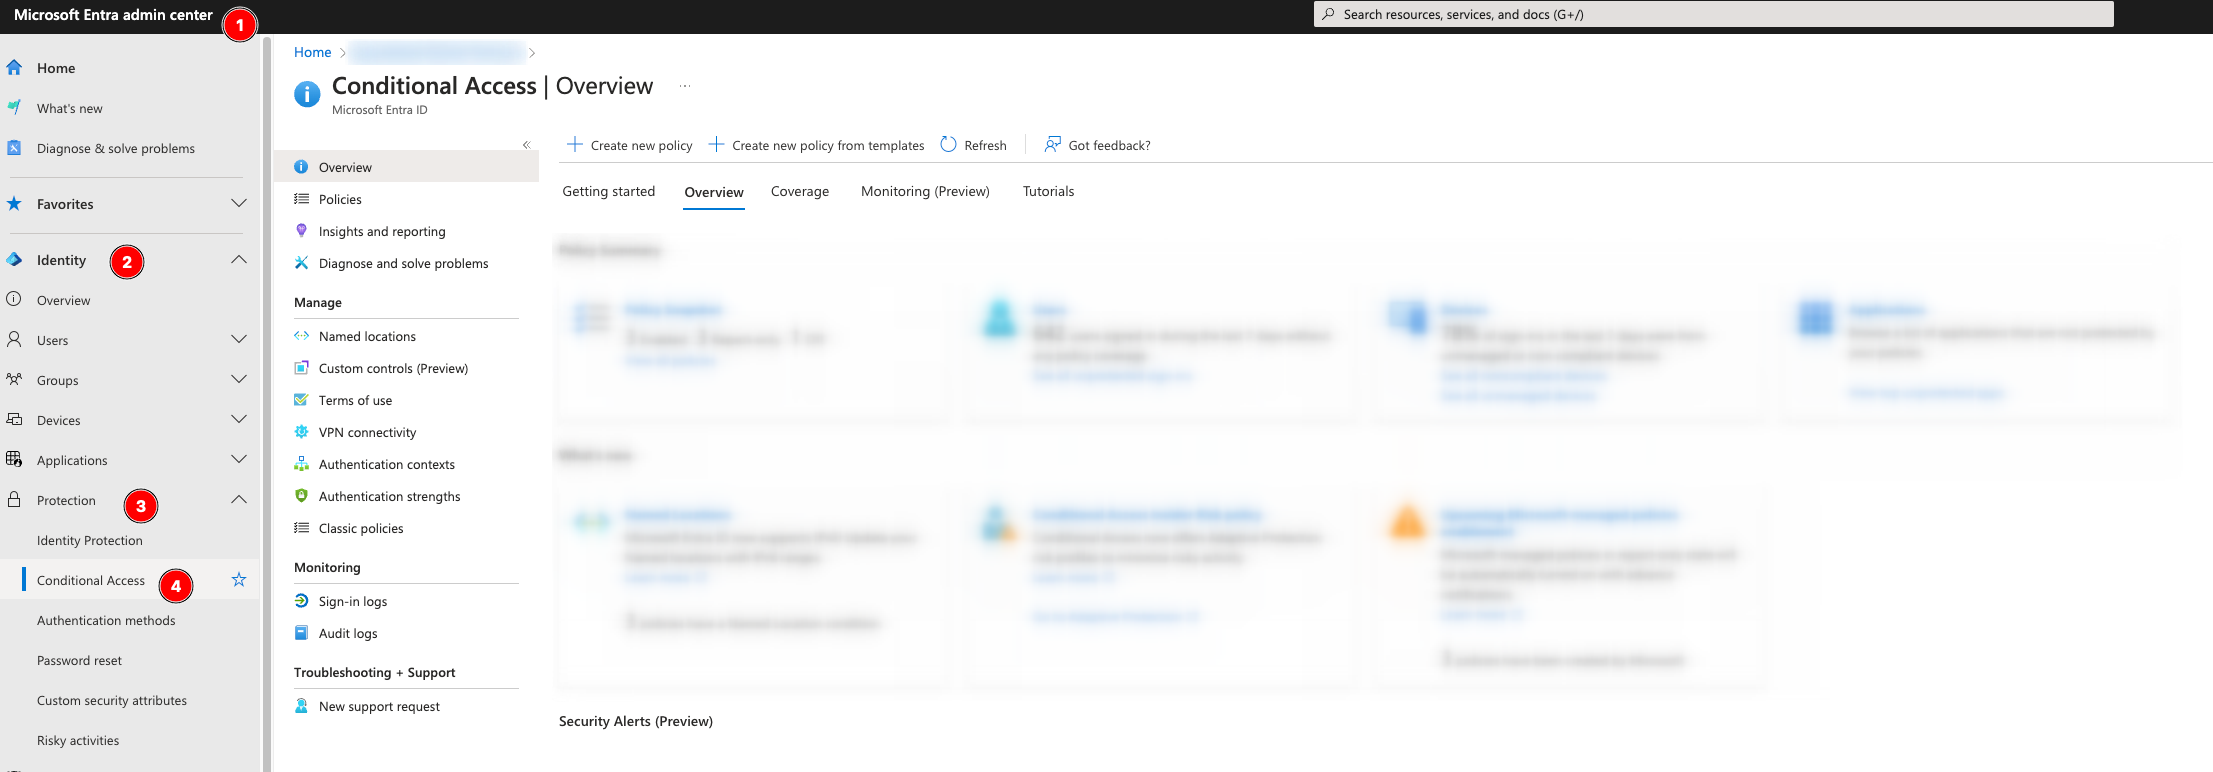
To use Conditional Access to enforce MFA for the AVD environment access, we’ll need to sign in to the Microsoft Entra Admin Center.
Head to Identity, Protection, Conditional Access:
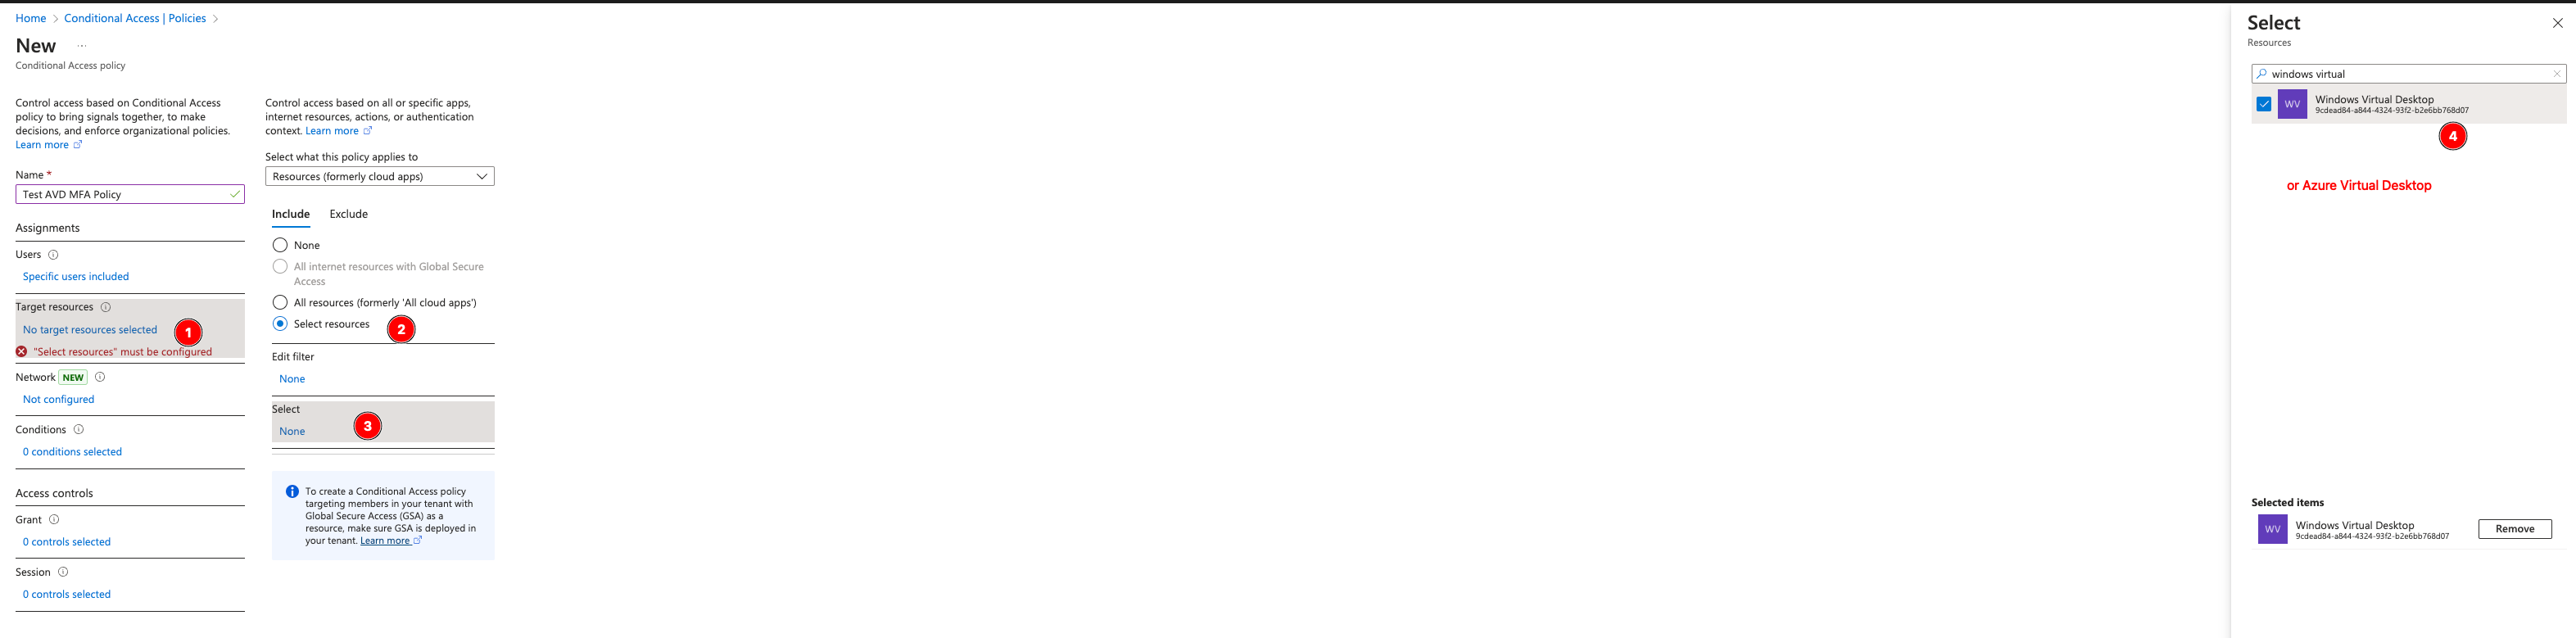
Under Users, select the groups (ADMIN and DEVOPS) from earlier.

Target Resources, select the cloud app Azure Virtual Desktop (or Windows Virtual Desktop if your tenant is older).
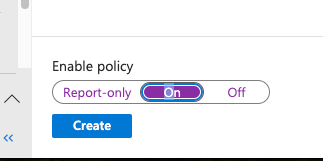
Under Grant, select Grant Access and Require Multifactor Authentication, or whatever shim you wish to use here.
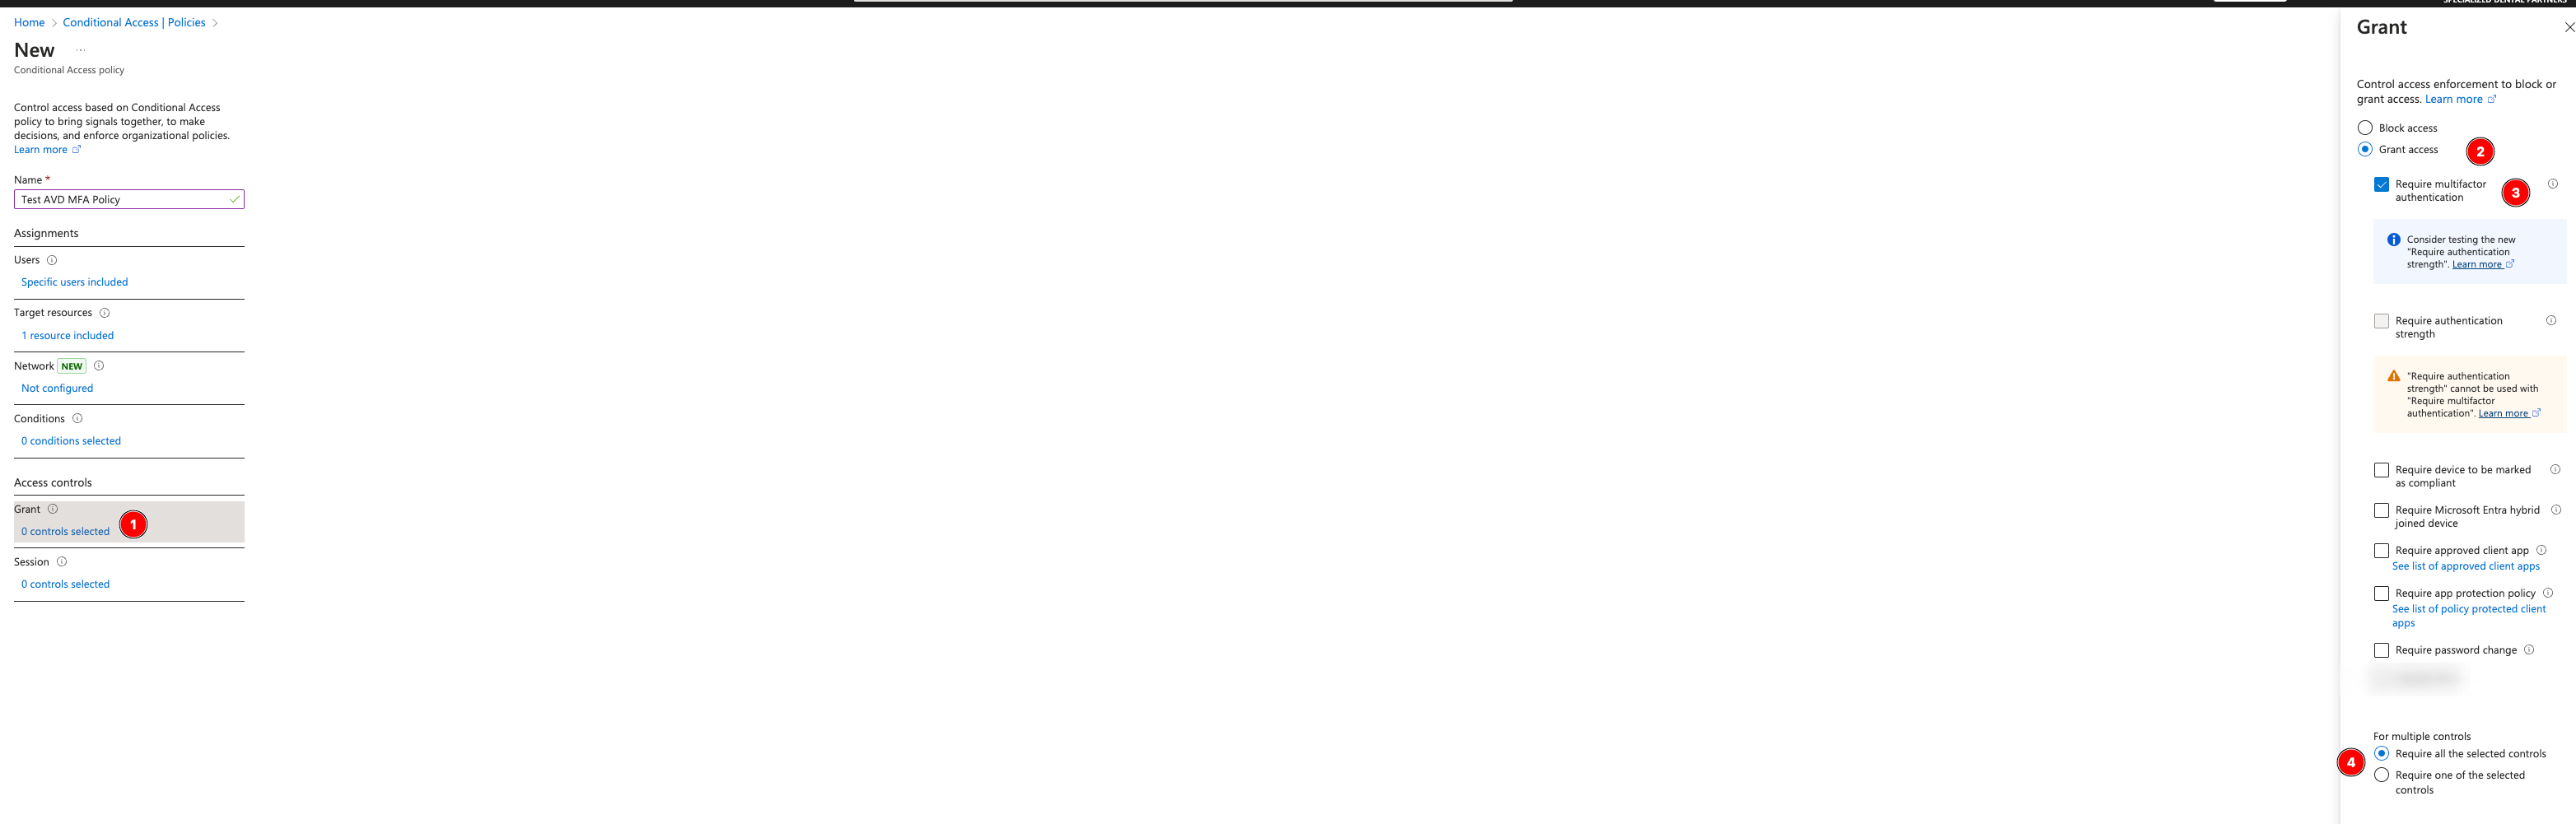
Turn it on and Create!
Accessing the Azure Virtual Desktop Environment
There are annoyingly multiple ways to access the environment and conflicting documentation, so we’ll cover them all!
First, if you’re familiar with the old RDWeb service from RDS, this is the link you use for the Microsoft-hosted AVD: https://rdweb.wvd.microsoft.com/
Next, if you want an HTML5 client that will run on anything, here is the Web Client link: https://client.wvd.microsoft.com/arm/webclient/index.html

This can make connections and share resources with Redirection like you’re used to, but via HTML5 instead of a fat client, which is a good use-case for many businesses:
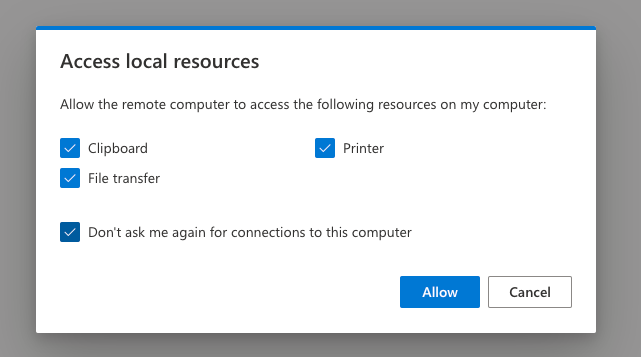
However, it annoyingly needs to approve connections to each virtual host for your account:
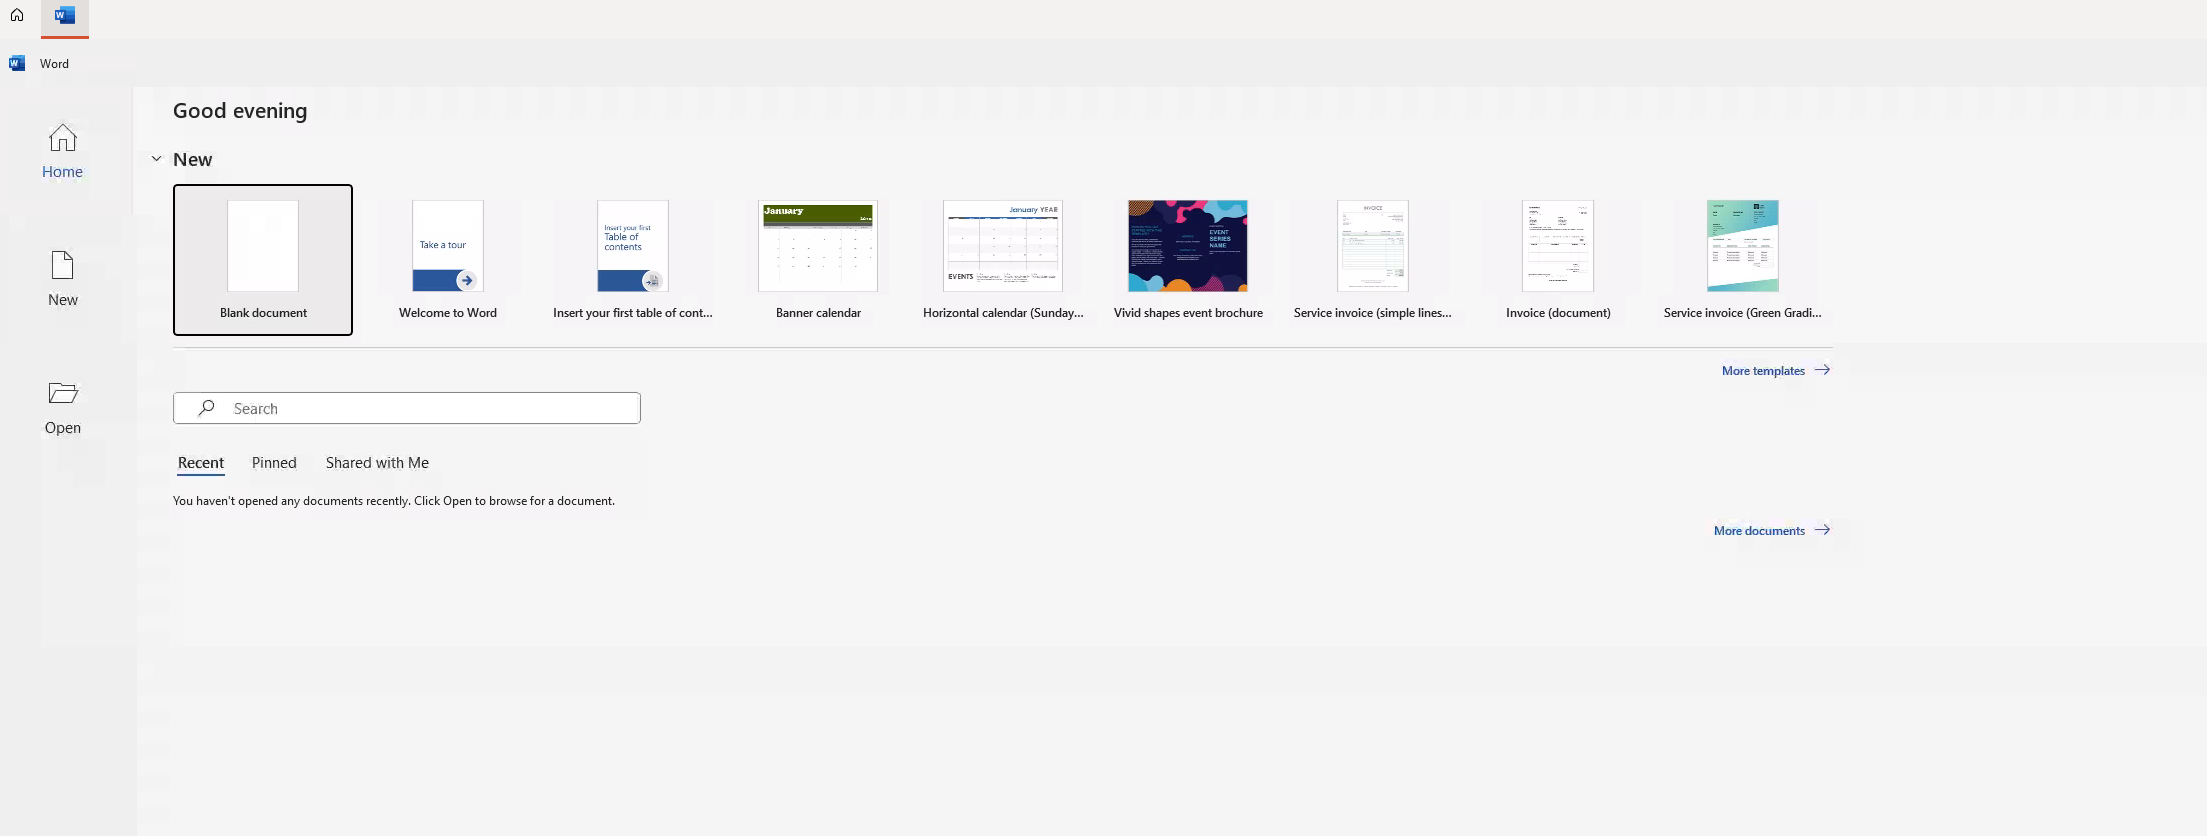
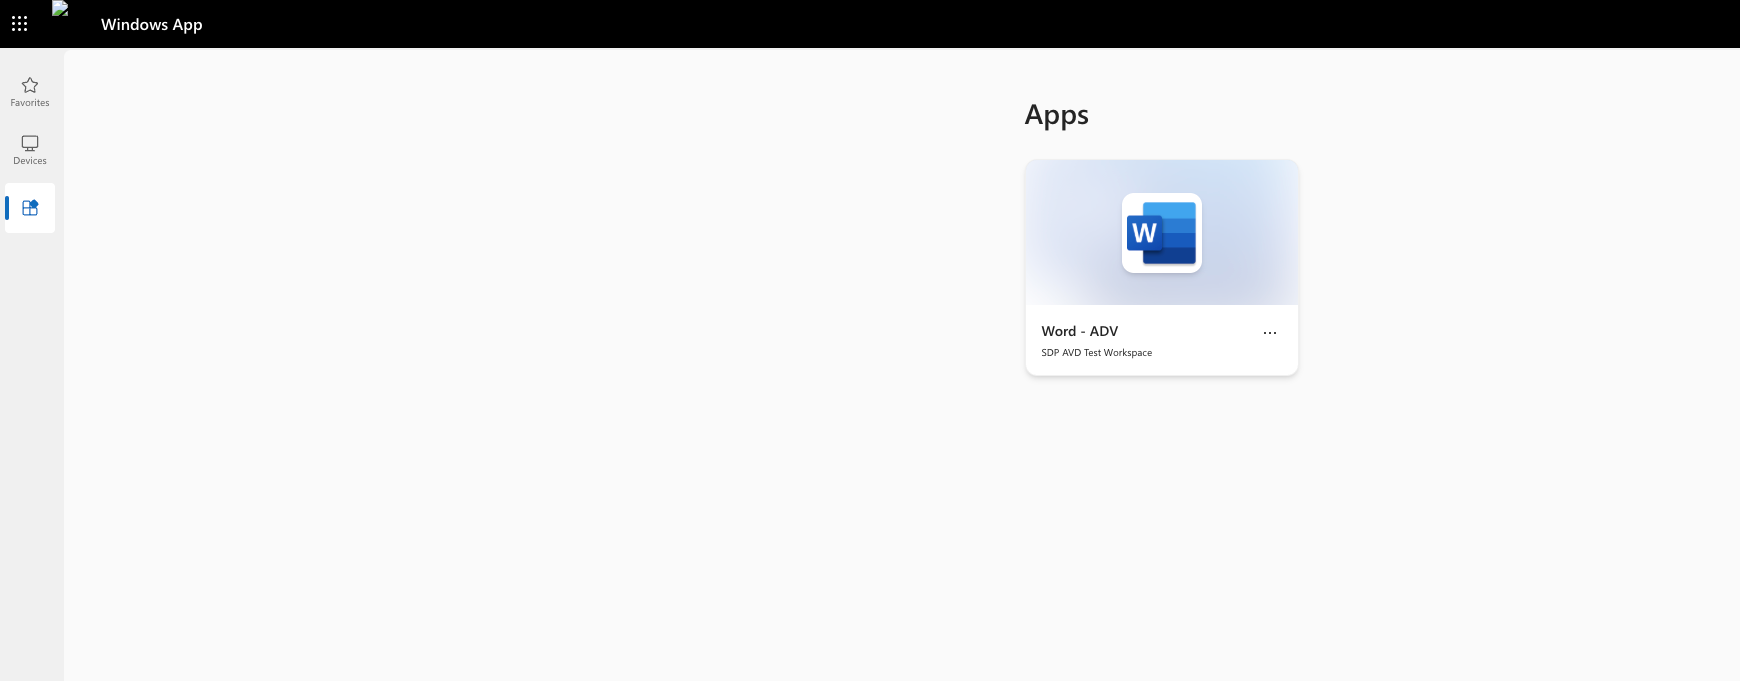
But then it will launch your RemoteApp or Desktop in full screen within a web browser! Here’s Microsoft Word:
Now hold on….didn’t I see something about a Windows App from that screen? Well yes you did…

Here is the link for the Windows App, part of the Office365 rebranding: https://windows365.microsoft.com/ent#/
But wait, there’s more!

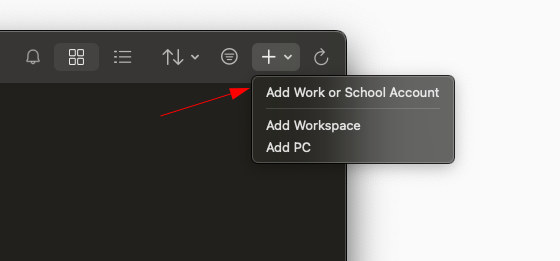
The Windows App fat client (formerly Remote Desktop):
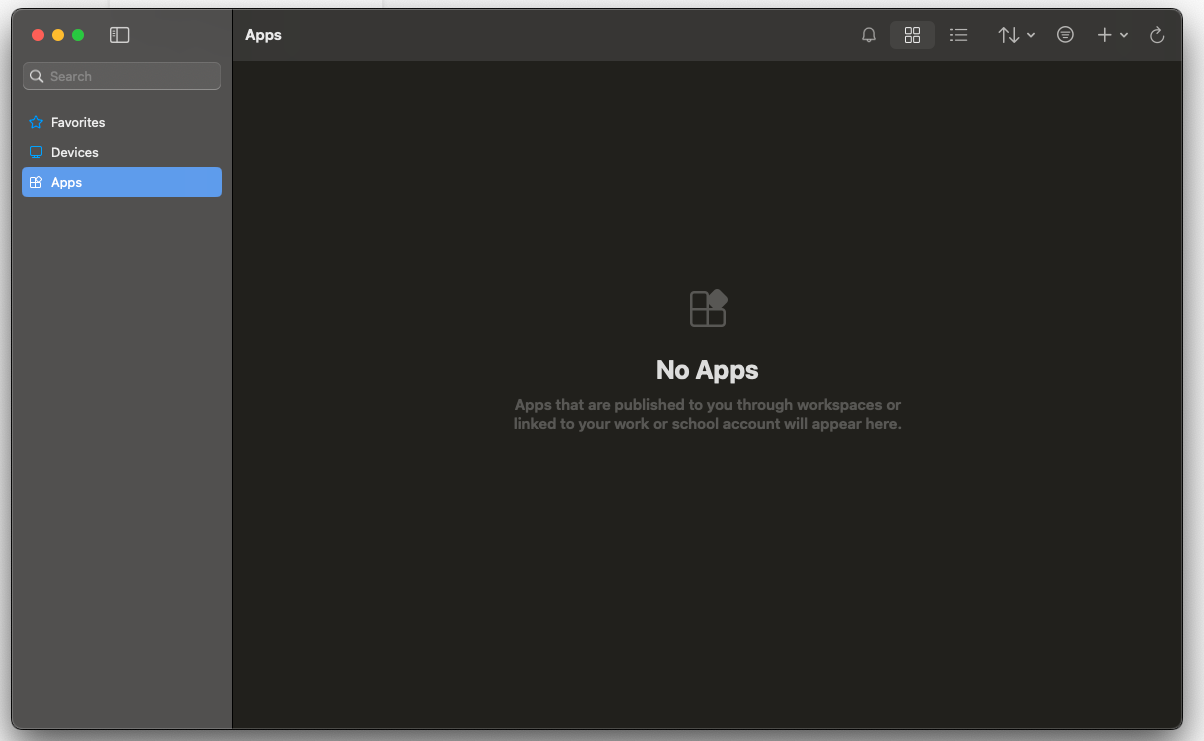
Once you have it open, go to the +, then Add Work or School Account
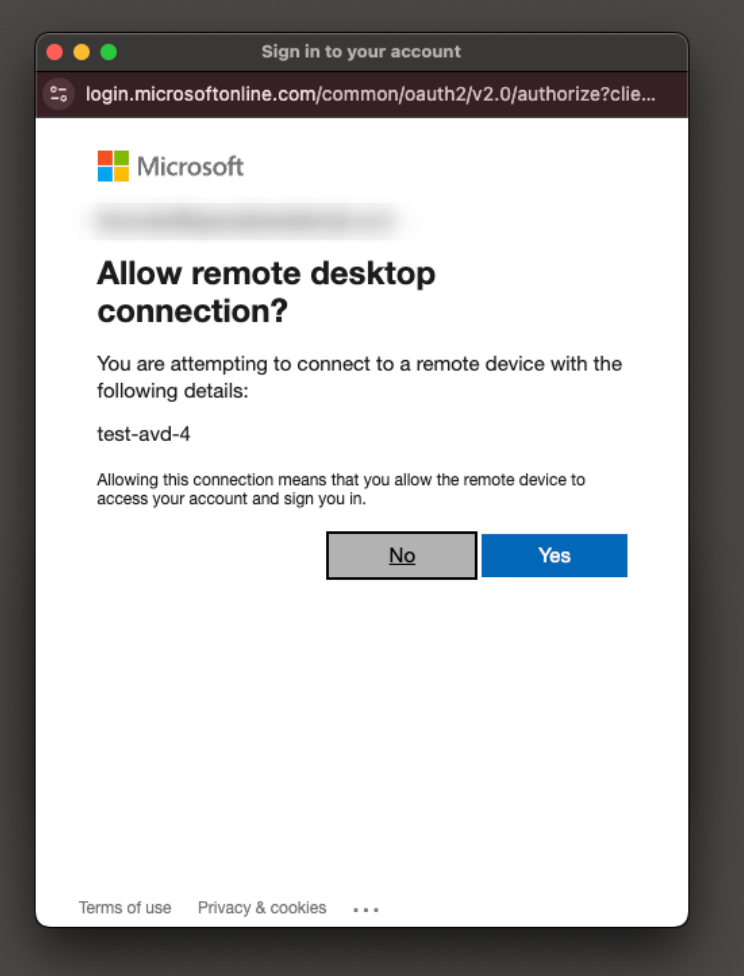
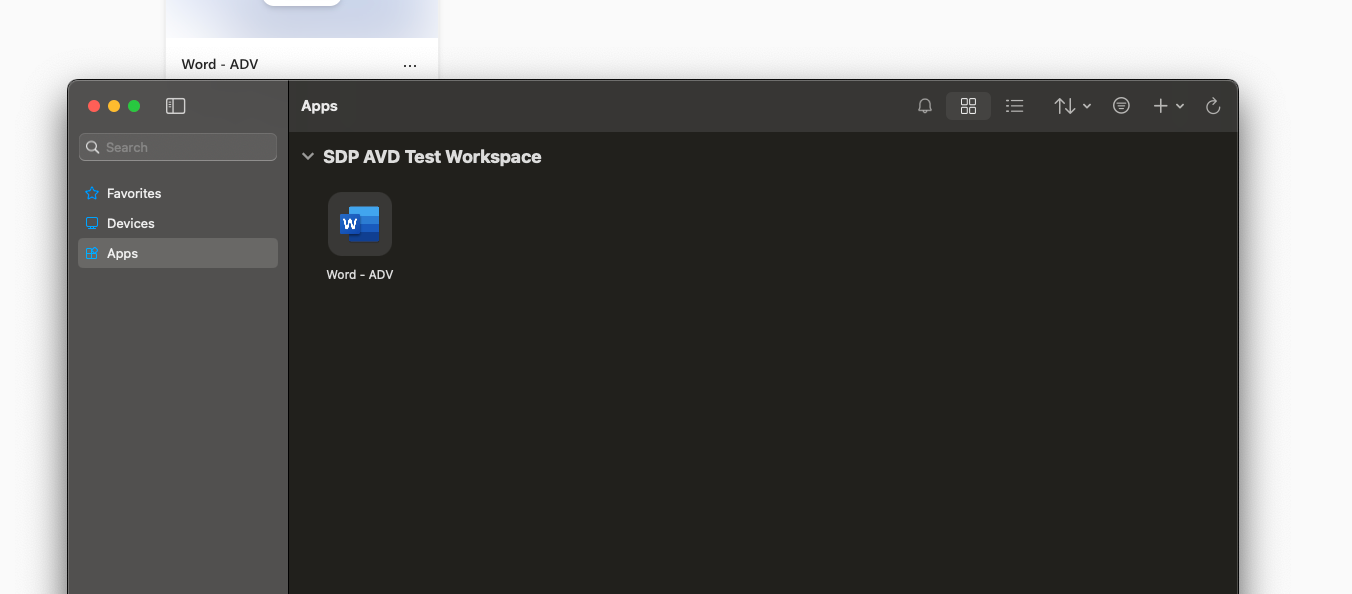
Sign in, MFA and bam! There we are!
By the end of this process, you should have a fully functional base Azure Virtual Desktop environment. In later posts we’ll cover modifying it, pushing custom images, adding resource pools and integrating with the rest of your environment!